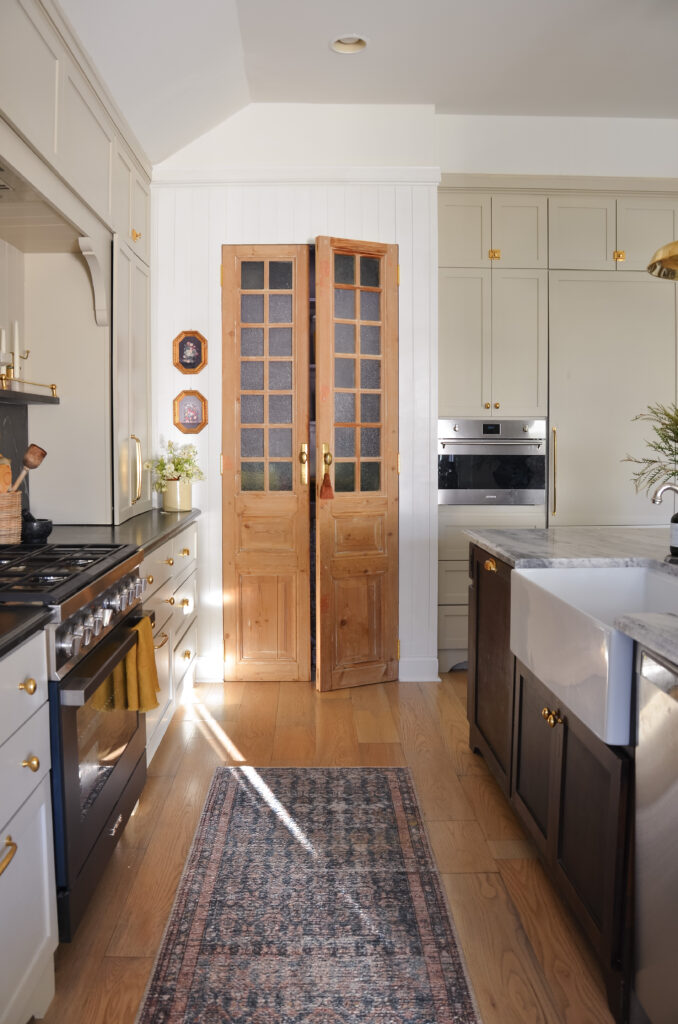
The post Holiday Gift Guide For Him appeared first on .
]]>
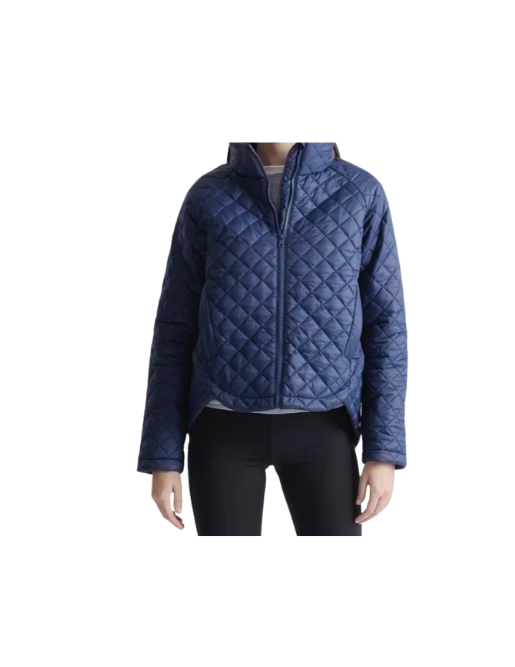
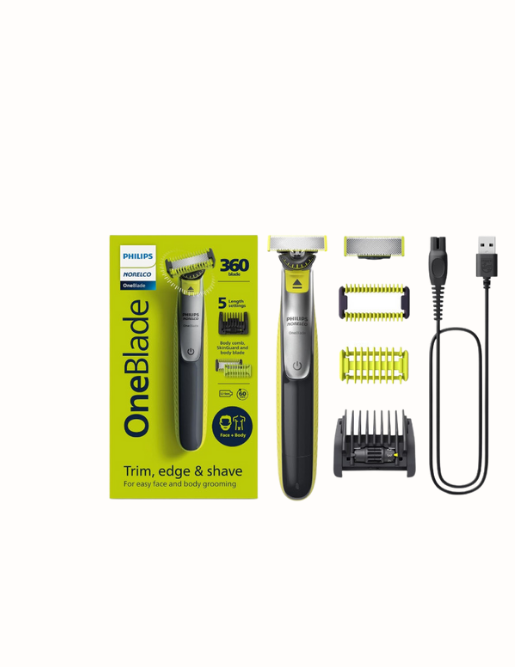
Ladies and Gents, get ready to be blown away by our holiday gift guide “For Him” – a collection that’s not just a selection, but a journey into the height of masculine luxury and style! From high-end jackets and Coach gloves that redefine sophistication to leather travel cases ensuring his treasures travel in opulent security, we’ve curated a lineup that goes above and beyond expectations. Elevate his moments of leisure with Yeti portable cooler bags for epic guys’ nights, tailgating, or football Sundays, while a luxury weekender duffle adds flair to spontaneous getaways. For casual days, there are quarter-zip sweaters that effortlessly merge comfort with style, and an indoor putting green to refine his golf skills at home. Impeccable grooming takes center stage with a face and body electric trimmer and shaver, ensuring he’s clean-cut and suave for his lady. But that’s not all – a heated neck massager offers relaxation after a hard day’s work, a Bluetooth record player turns tech for the classic man, and a two-tone watch from Fossil is the timeless accessory for every occasion. I poured my heart into this section, recognizing that even though men are easy to please, they deserve the cream of the crop. There’s something for every type of guy in your life, so dive in and let the excitement of holiday shopping begin!
Yours Truly,
Ryia
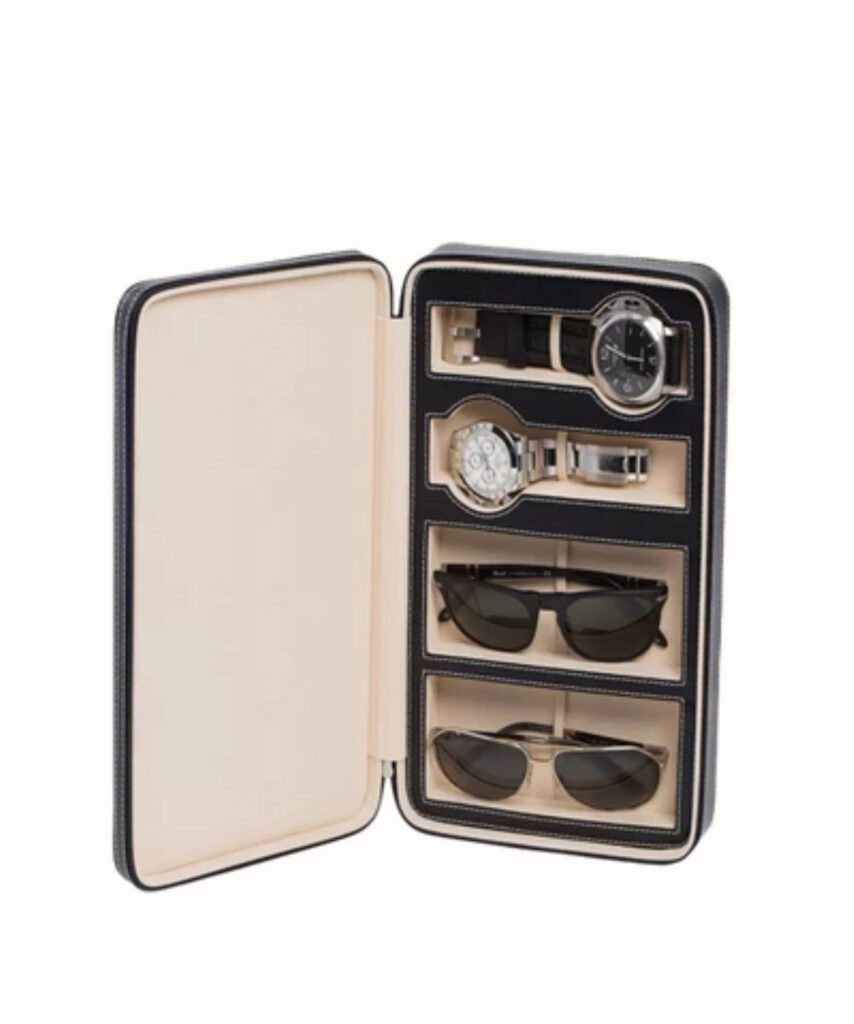
LEATHER TRAVEL CASE
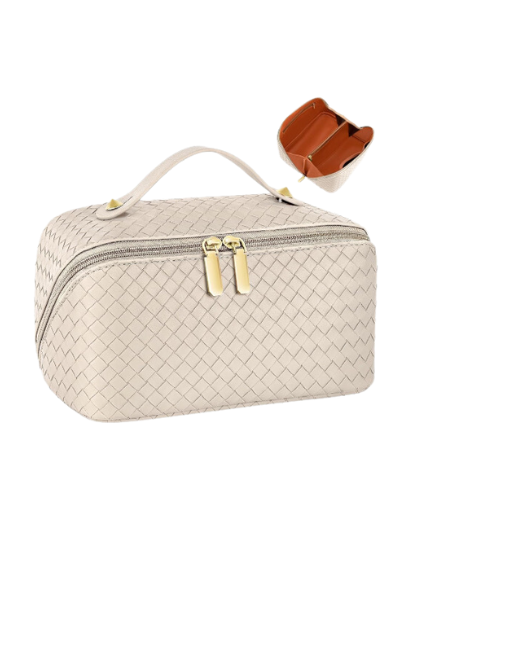
This genuine leather travel case is perfect for him because it offers a stylish sanctuary for his most cherished jewelry, watches, and sunglasses. With custom laser branding featuring his monogram initials, it becomes a uniquely personalized accessory. The form-fitted design, scratch-resistant lining, and secure zipper closure make it ideal for keeping all his valuables safe while traveling in unparalleled style. Elevate his journey with this fusion of luxury, design, and function – a thoughtful companion for the stylish explorer.

LEATHER TECH GLOVES
These Coach leather tech gloves? Absolute winners! The smooth nappa leather combined with a cozy merino wool lining is like the perfect style and snug level for HIS hands. Plus, the touch-sensitive tech is a total win – texting without freezing those fingers is a must have feature . Seriously, HE’LL be over the moon about these gloves. If I were you, I’d snag a pair for HIM Seriously, grab these for the guy in your pronto. Trust me, it’s a no-brainer.


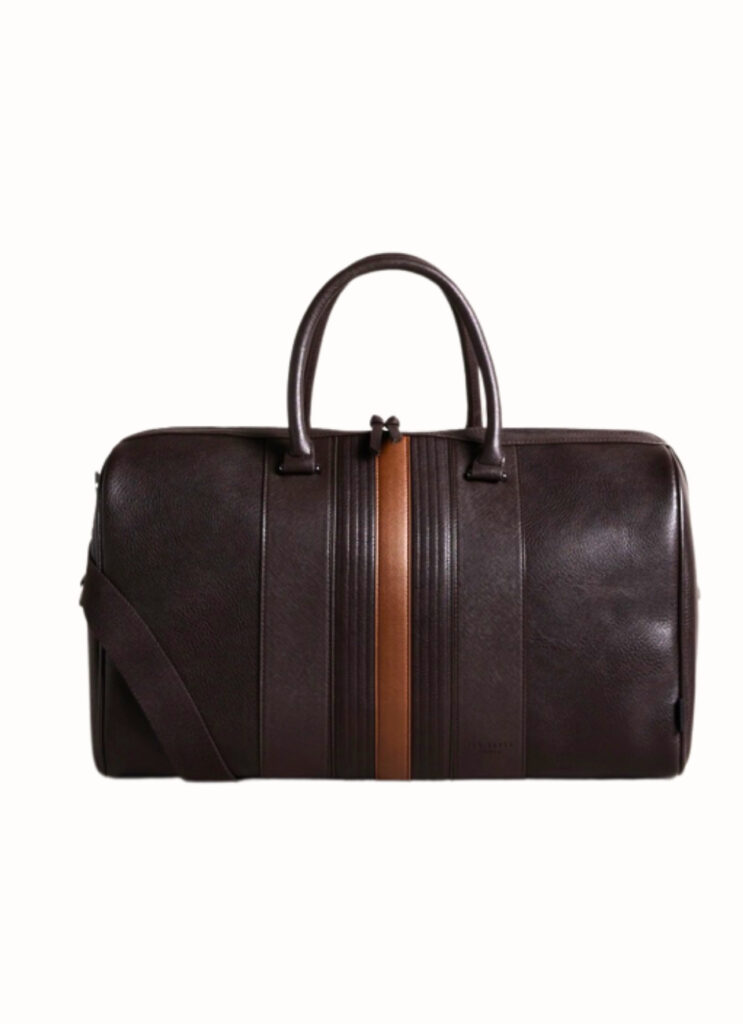
TED BAKER WEEKENDER
let me tell you, it’s not just a bag – it’s THE bag. For any guy you’re gifting this holiday season. This thing’s like a portable life organizer. Fits HIS gadgets, gym gear, whatever – you name it, this bag’s got it. And that leather exterior? Pure class! So, if you’re on the hunt for the perfect gift for your guy, this bag is the move. Thank me later.

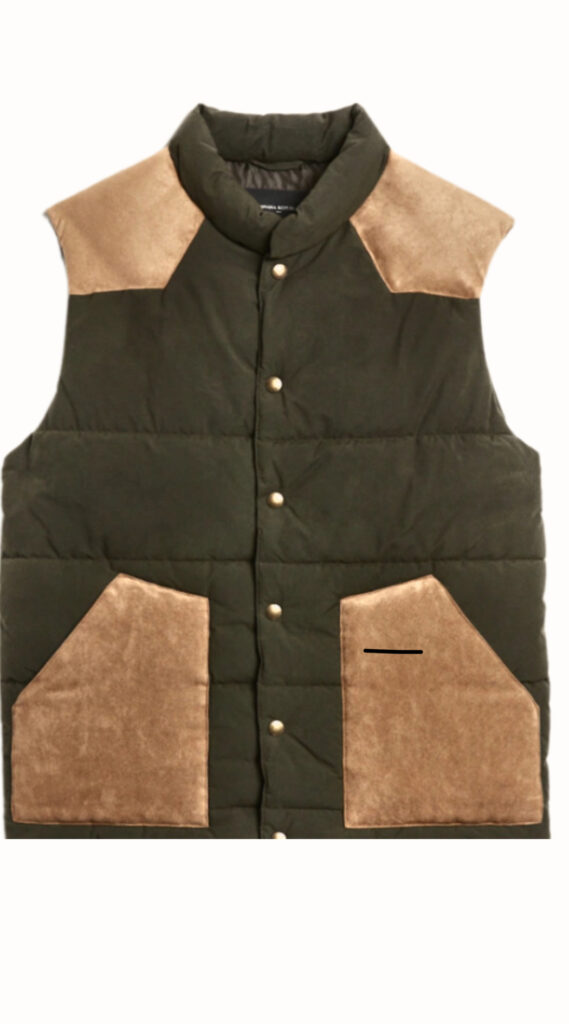
PUFFER VEST
I’ve been hunting for the perfect piece to level up HIS winter wardrobe, and guess what? This vest is for the taking! It’s not just a layer; it’s a style statement waiting to happen. Now, here’s the kicker – it’s a Banana Republic Factory exclusive. Yeah, we’re talking about a piece that’s got that limited edition look and feel. So, if you’re all about gifting HIM something that’ll turn heads no matter how HE styles it, this puffer vest is the ace.


YETI SOFT COOLER
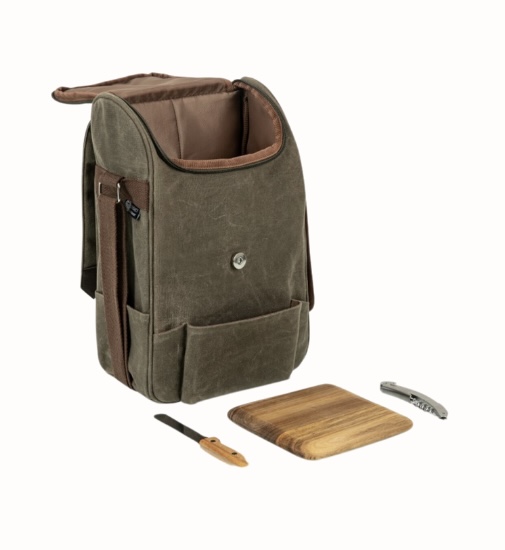
Imagine this: guys’ night out, tailgating shenanigans, or those epic football Sundays – this cooler will be HIS go to sidekick With ColdCell Insulation keeping the brews ice-cold and room for 12 cans plus ice, it’s a party in a bag. It’s practically indestructible, ready to face whatever HIS adventures throw at it. Trust me, once HE’S got this cooler by HIS side, HE won’t know how HE lived without it.







The post Holiday Gift Guide For Him appeared first on .
]]>The post Guest Bathroom Remodel: A Journey from Bland to Grand appeared first on .
]]>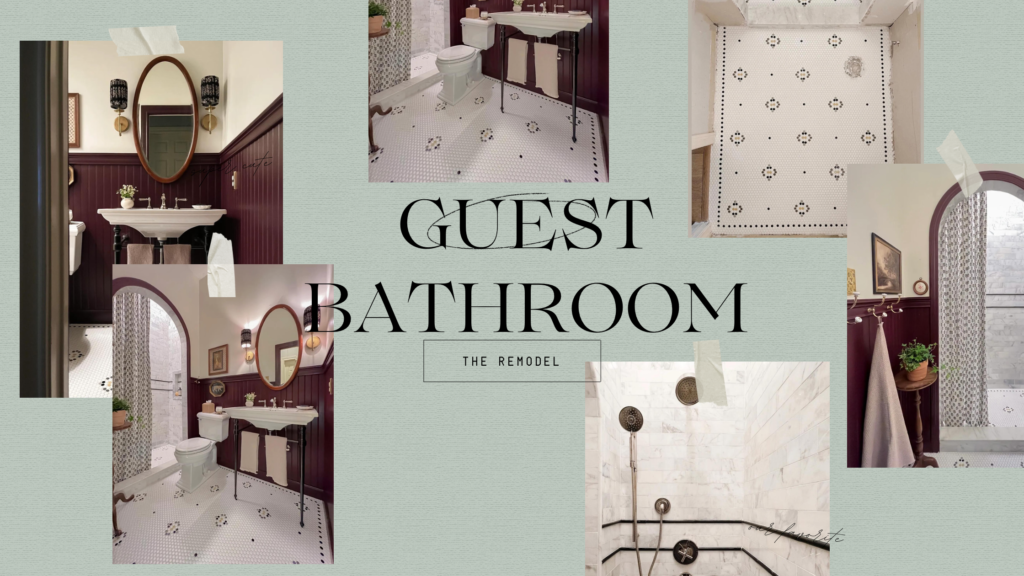
Let’s be honest; we’ve all encountered that one room in our house that, well, let’s say it could use a little makeover. For me, that room was our guest bathroom. Since October 2021, I’ve been on a quest to transform this space into something special. But my dreams of a swanky guest bathroom have been brewing since May 2021, right when we moved in. And boy, what a journey it’s been!
Sponsored by Home Depot and Gifted by Kohler
First things first, a massive shoutout to our sponsors, Home Depot and Kohler, who made this crazy adventure possible. With their support and some of their fabulous products, I set out to turn a ho-hum bathroom into a Retreat
.
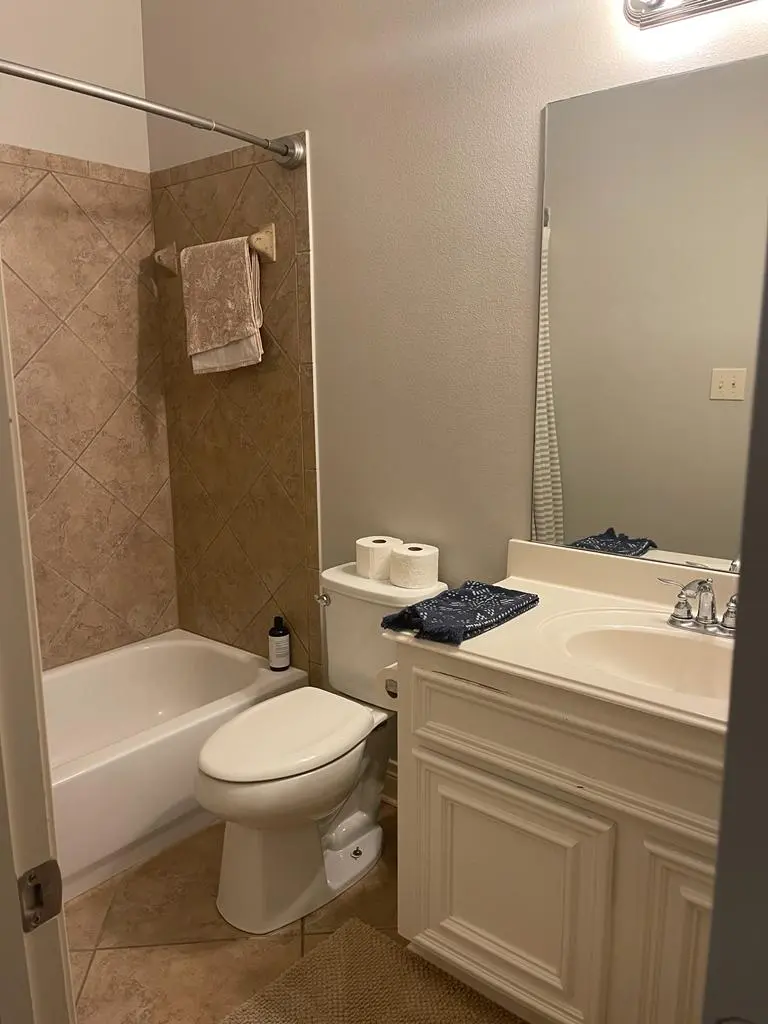
The “Before” – Yawn!
When we moved into our home two years ago, our guest bathroom was the embodiment of builder-grade everything. Boring tiles, a run-of-the-mill vanity, and a tub straight out of a generic catalog. But this was our chance to make a statement and infuse a touch of my Indian heritage into the space.
The Demolition
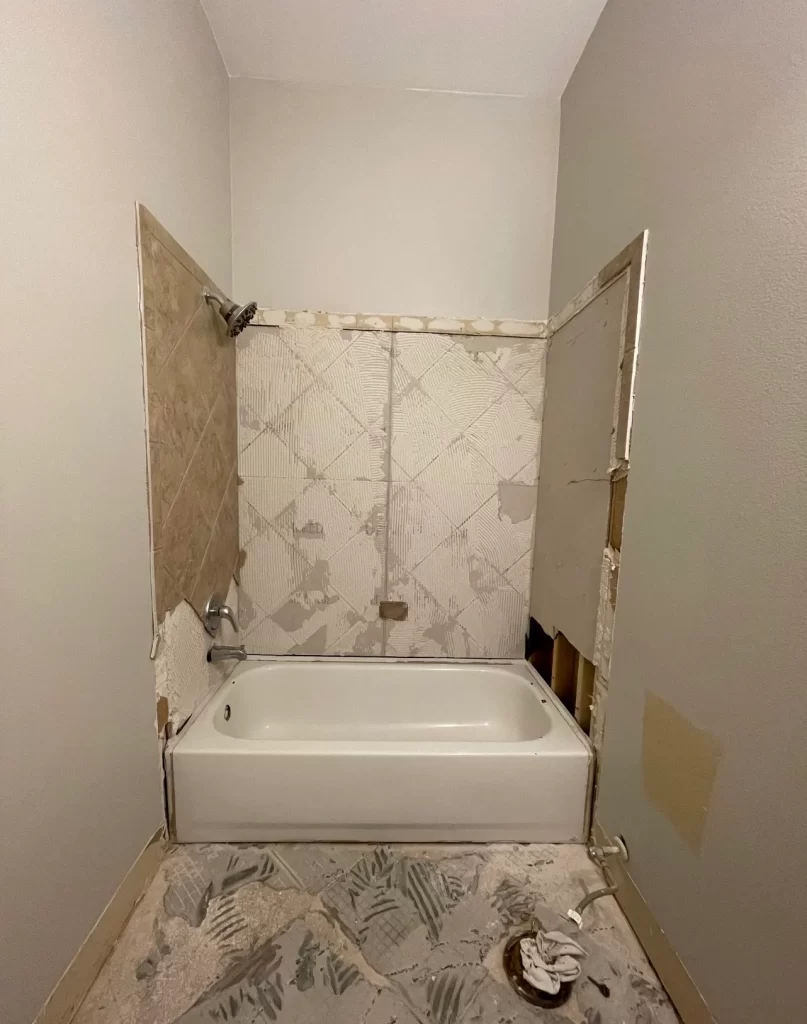
My first order of business? Bye-bye, bathtub! In its place, we envisioned a comfortable walk-in shower – perfect for my in-laws who visit frequently and are in their late 70s. But fret not, we still have tubs in the other two bathrooms, just in case.
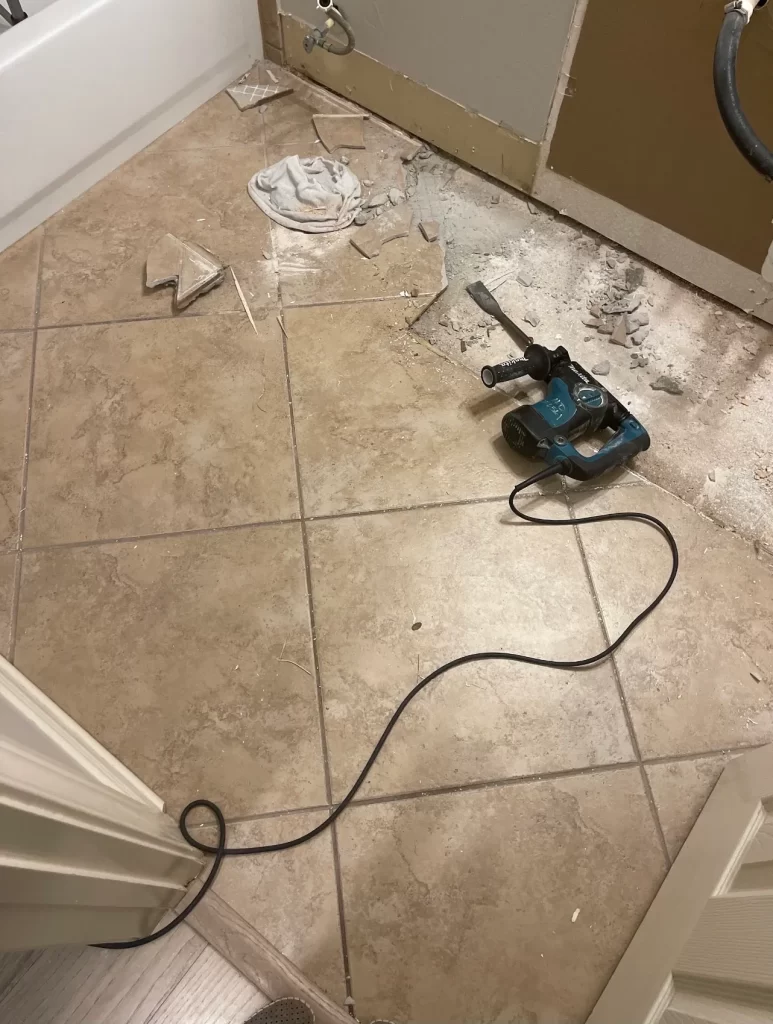
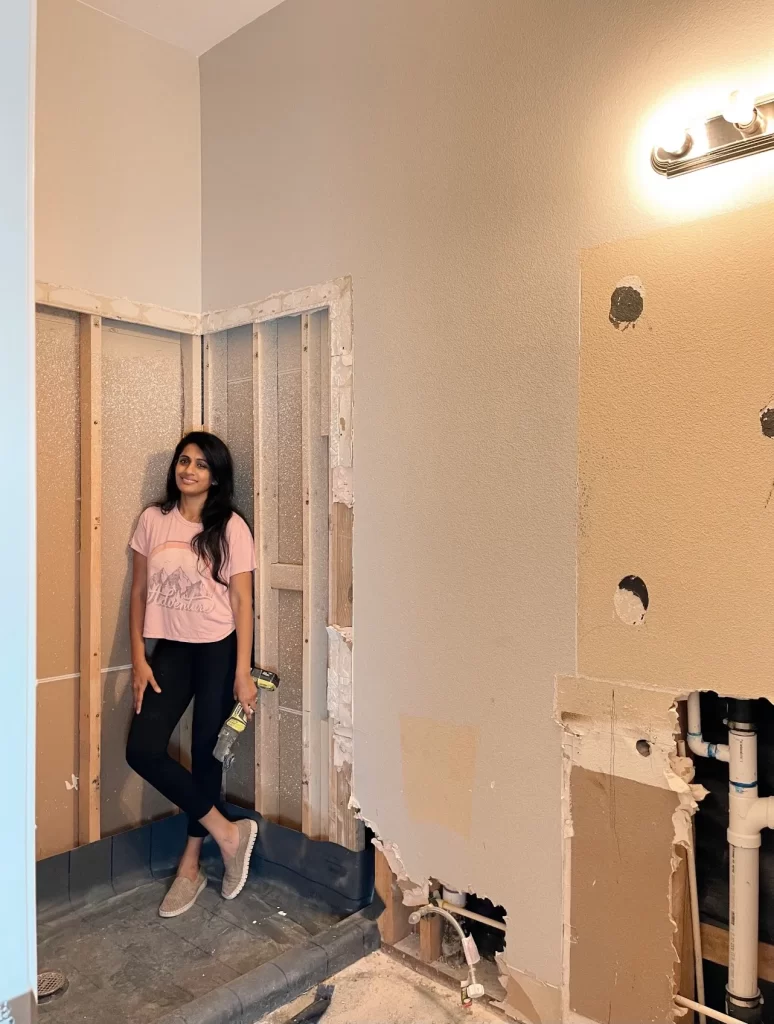
For the demolition work, I enlisted the help of Home Depot’s rental tools, including a rotary hammer and chisel bit, which was a real time-saver. We stripped the bathroom down to its bare bones, donating whatever we could salvage.
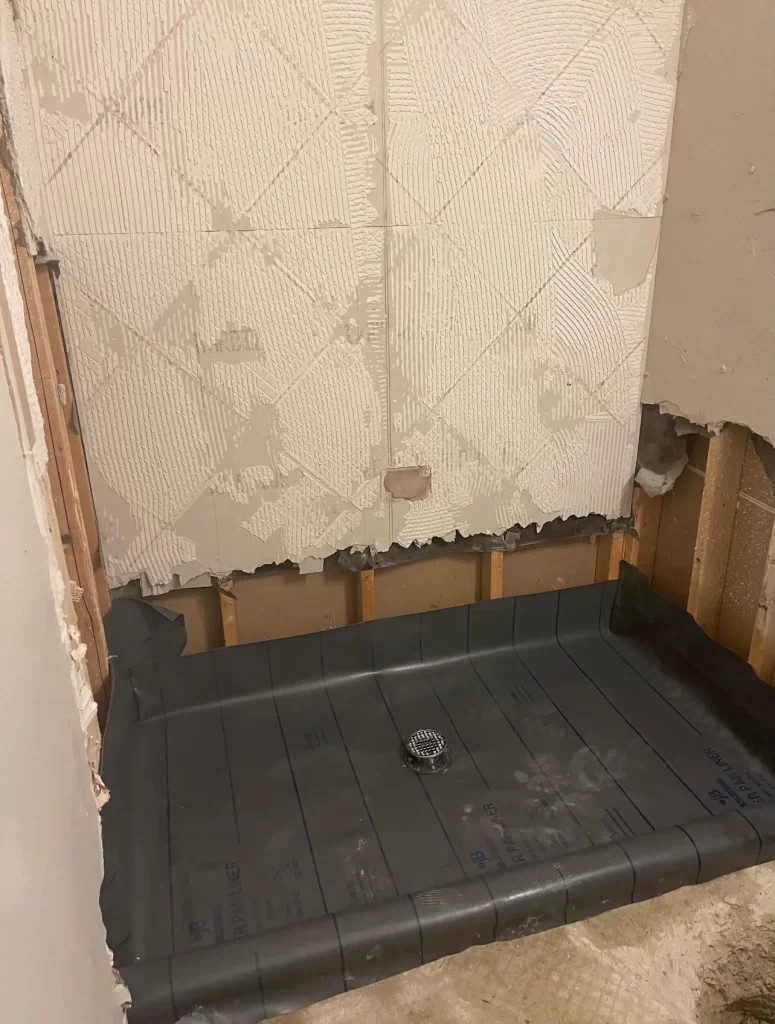
Plumbing process
The next step was the plumbing. We shifted the shower drain to the center, revamped the vanity plumbing to match the new console sink, and even scooted the toilet 5 inches to the right to create some extra elbow room for the shower.
Our plumbers then did a fantastic job crafting a shower curb, installing the shower floor liner, and conducting the all-important flood test to ensure a watertight seal.
Shower Spectacle
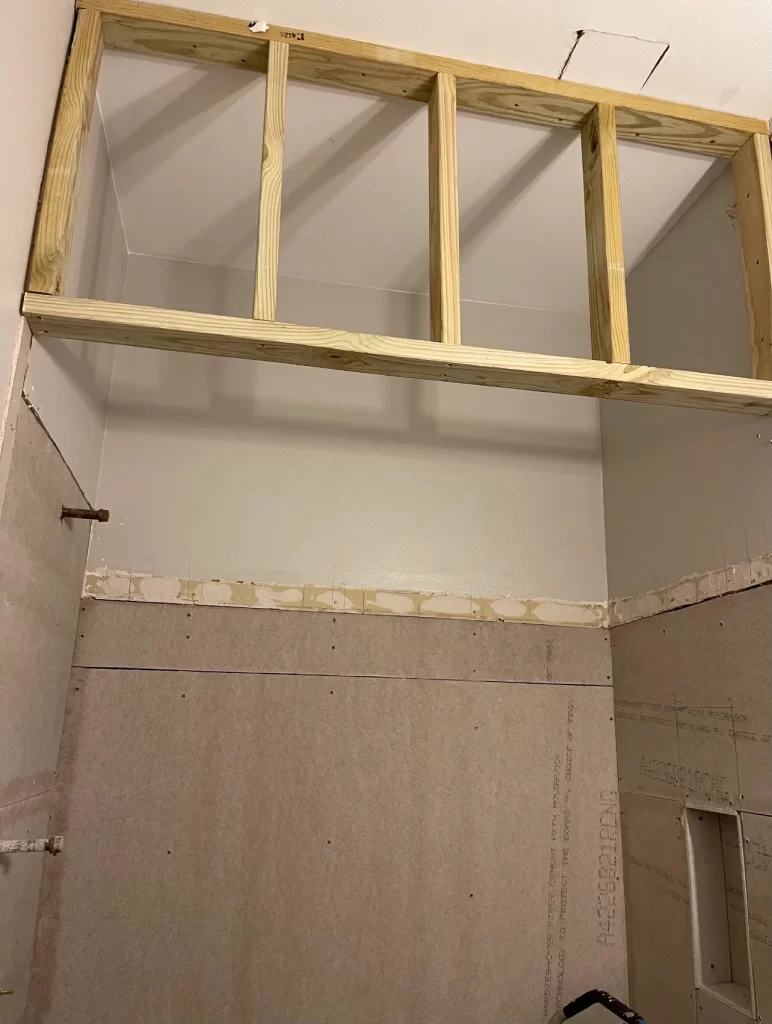
Now, here comes the fun part. I’d always dreamt of an arched entry to the shower, and that’s precisely what we set out to create. Armed with 2x4s, plywood, drywall, cement board, and an abundance of determination, I went about crafting this masterpiece. After a hearty round of taping, thin-set, and waterproofing with Red Guard, we were ready for the main event – tiling. But let’s be real; tiling isn’t my jam, so I called in the experts.
A Tile Tale
During the tiling escapades, I had a bit of an “Oops!” moment. A quarter of the shower tiling was done, and I realized it just wasn’t working. Talk about a curveball! Around this time, I jetted off to India for a month and had some time to contemplate the bathroom’s destiny. I returned with a choice – a marble tile from Home Depot that left me beaming.
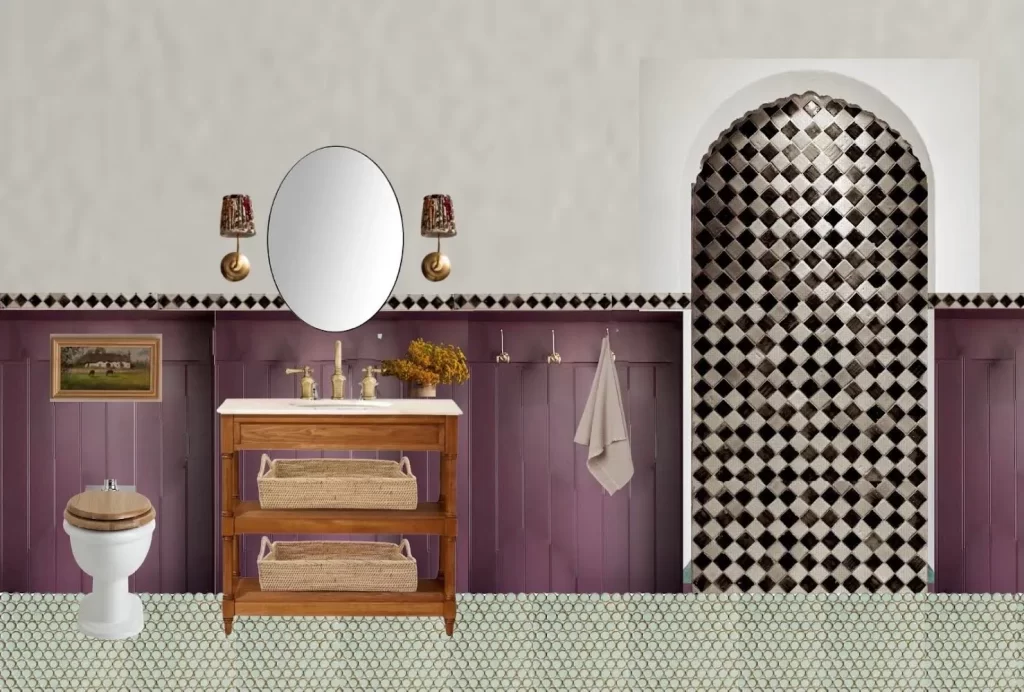
To add a dash of drama, I introduced a black trim tile for that extra oomph and a marble chair rail for some panache. The floor got the penny tile treatment, with a twist. No checkered shower wall for me; I went rogue with a unique pattern of black, grey, and mustard penny tiles. I’ll spill the beans on that adventure in a separate post. But here’s a hint: choosing the right grout for the right spaces is a crucial step in the process.
Bathroom Walls with a Twist
To crown this renovation masterpiece, I decided to trim out the arch opening with some flex trim molding from Home Depot. For the walls, I chose vinyl beadboard, ensuring it wouldn’t bubble up and ruin my hard work, which can happen with MDF in a bathroom which you should never use in a bathroom.. The transformation was complete with a decorative chair-rail and baseboard.
And let’s talk paint! A rich plum/eggplant shade, matched at Home Depot, breathed life into the space. But here’s a pro tip: a higher sheen, especially in a small, windowless bathroom, can work wonders, creating a more elevated ambiance.
The Perfect Fittings
The real stars of the show, the fixtures, made their debute. Kohler’s creations in polished nickel complemented the marble and the eggplant paint seamlessly. The console sink legs and the 30” sink were the perfect touch.
The faucet, a piece from the Artifact line, left me mesmerized, blending timeless classic design with a modern twist. And that toilet? The best toilet I’ve ever encountered, with edges that mimic the chair-rail in the bathroom.
The shower faucet, plucked from the Purist line, delivered clean, simple lines and a modern vibe. I couldn’t resist and went for both the shower head and handheld shower. Blending elements from both the Artifact and Purist lines brought my vision to life – Modern Traditional at its best.
The Cherry on Top
Adding my personal touch to the space, I crafted a shower curtain using Indian block print fabric and incorporated Indian-inspired art. An old wall sconce got a second life, and a pleated lamp shade, fashioned from fabrics I picked up in India, cast a warm glow.
To put the finishing touches in place, I stumbled upon a beautiful vintage mirror that fit the space perfectly. Brass and porcelain hooks from Home Depot were a brilliant addition, and I swapped out plain switch plates for brass ones.
To say I’m over the moon with how this space turned out would be an understatement.
Total Costs
- Home Depot products: $1,900
- Kohler products (gifted): $6,000
- Labor for laying tiles: $1,500
- Plumbing work and cost: $1,900
- Miscellaneous expenses: $100
- Total cost: $12,000
This guest bathroom remodel was not just a transformation of a space but also a journey of self-discovery. Home Depot and Kohler, you’re the real MVPs, and I’m thrilled with the results!
The post Guest Bathroom Remodel: A Journey from Bland to Grand appeared first on .
]]>The post Holiday Gift Guide For Her appeared first on .
]]>
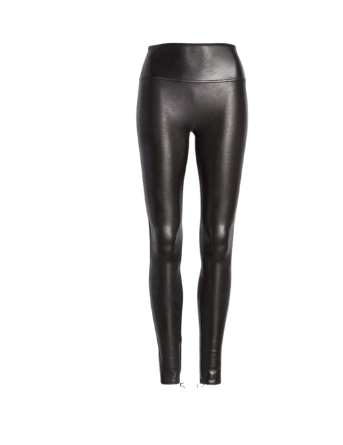
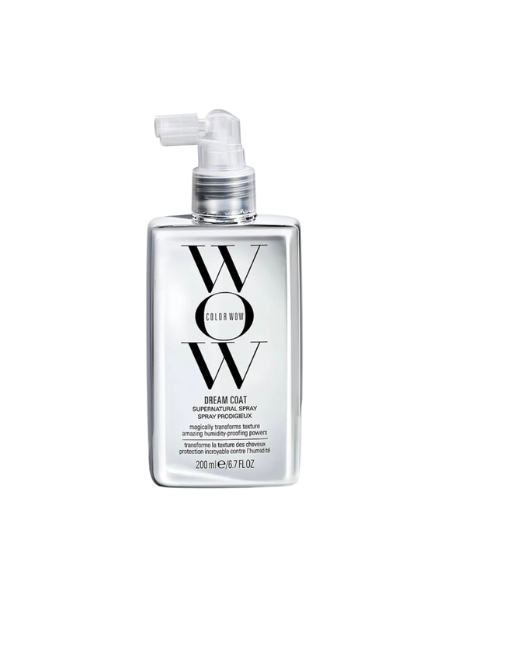
Ladies and Gents, brace yourselves for a holiday gift guide FOR HER that’s not just a curated edit but a ticket to a realm of Feminine energy! From high end bags to the allure of a top-of-the-line fragrance that’ll leave obsession in the air. Imagine cozy lounge essentials that will have HER in-luxury hibernation, because let’s face it, comfort is non-negotiable. We have just the magic potion for that glass skin SHE craves. And for those holiday soirées, we’ve got the perfect party dress and earrings that’ll have HER slaying the festivities. She’s dreamt of flawless hair without the fuss, and we have just the solutions with the Dyson Air wrap and the Color Wow Dream Coat Anti Friz Spray, because life’s too short for bad hair days. And we did not forget HER Tech needs we’ve linked the Gym Girlie Must Have Apple Air Pods Max’s because who says tech can’t be glamorous? Leather leggings for that snatched effect, designer coats, and more – this collection is the epitome of high-end meets trendsetting. If aesthetics is HER language, our gift guide is Her conversation starter. It’s not just about gifts; it’s about curating an experience that screams, “SHE’s extraordinary!”
So, skip the endless scrolling and dive in below. I’ve got everything HER heart desires for a Christmas that’s not just festive but fabulously flawless. Happy shopping!
Yours Truly,
Ryia
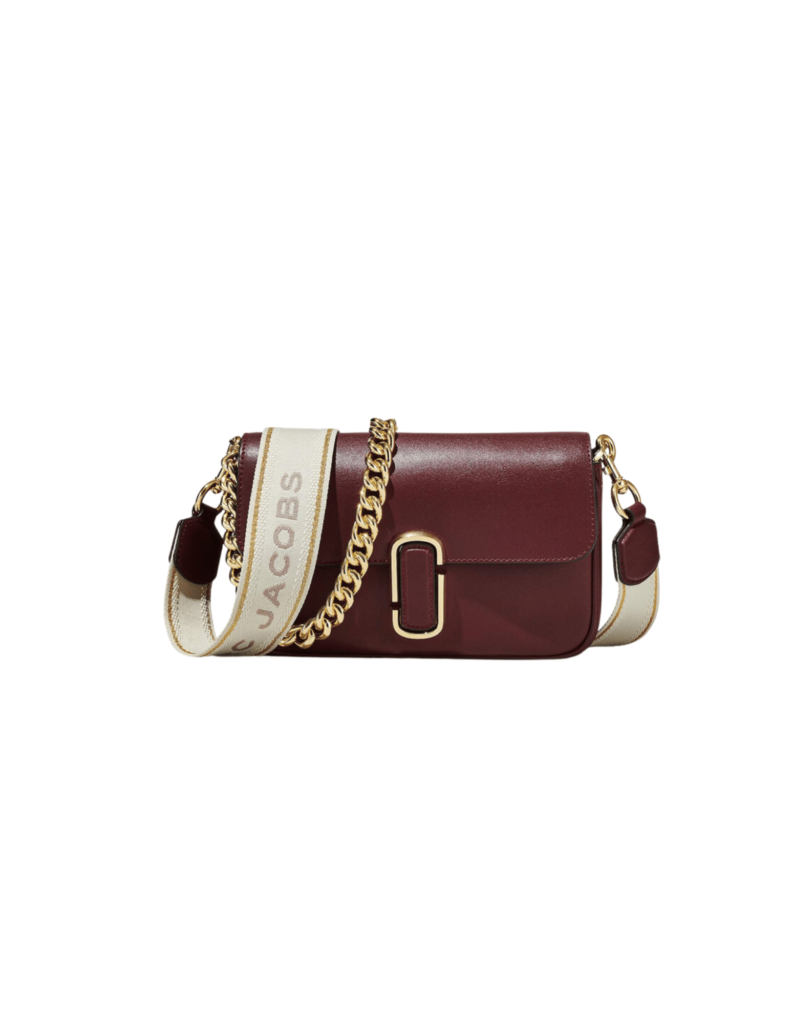
THE J MARC SHOULDER BAG
This bag will have HER gracing the holiday parties in style, with this jaw dropping design by Marc Jacobs. It’s the epitome of style and versatility! Crafted in smooth leather and sealed with the iconic J Marc hardware, it will effortlessly transition HER from formal to casual. Swap the chain shoulder strap for the webbing crossbody strap or go strapless for an elegant clutch – three looks in one chic bag. Elevate HER fashion game with this must-have accessory!

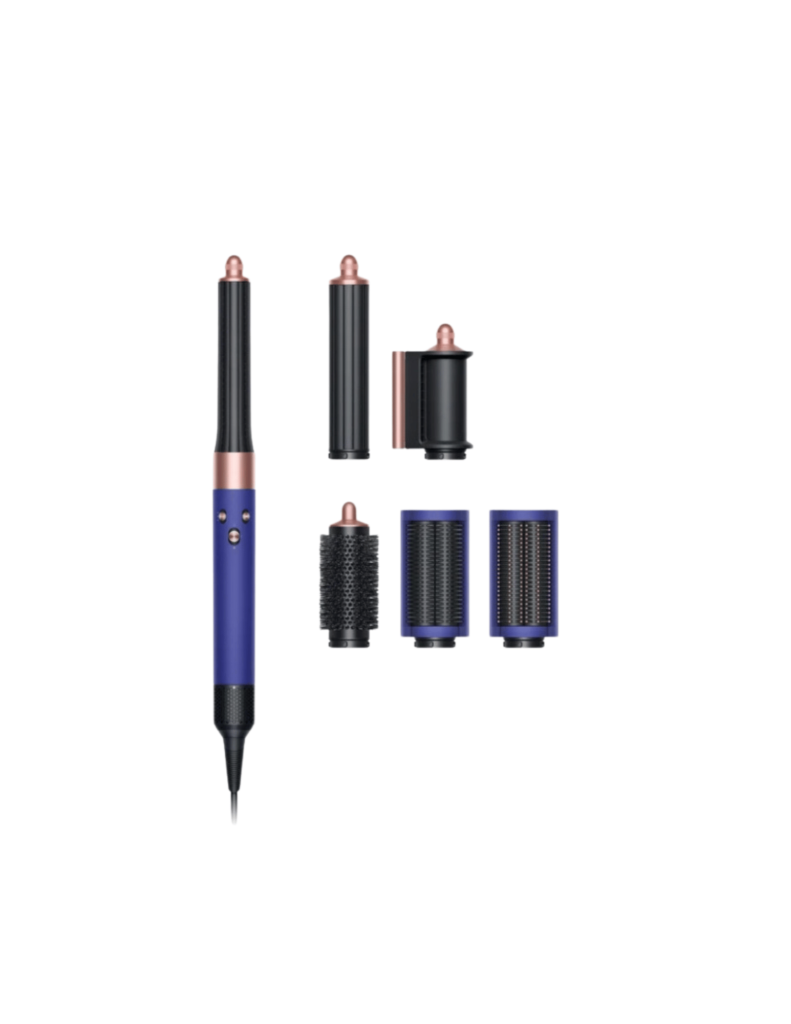
DYSON AIR WRAP MULTI STYLER
It’s a game-changer for HER! This innovative styling tool does it all – curls, waves, smoothens, and adds volume, all without extreme heat damage. It’s like having a salon in the palm of your hand. Trust me, your hair deserves this level of pampering.


CARACILIA LOUNGE SET
I’ve found the Amazon dupe for the Spanx Air Essentials set, and it’s everything and more! Perfect for HER daily activities, running errands, or hitting the gym. Whether SHE’S indoors or outdoors, dressing up or down, this cozy set has got HER covered. It’s not just a sweat suit; it’s a fashion statement that effortlessly combines comfort and style. SHE’LL be ready to slay fall, winter, and spring with this must-have loungewear set!

WOVEN TOTE BAG
I’ve finally found the perfect everyday bag for HER, this woven leather handbag not only fits HER daily essentials, but also transitions flawlessly from a beach tote to a chic crossbody shoulder bag. The ideal gift for the modern, on-the-go woman in your life!


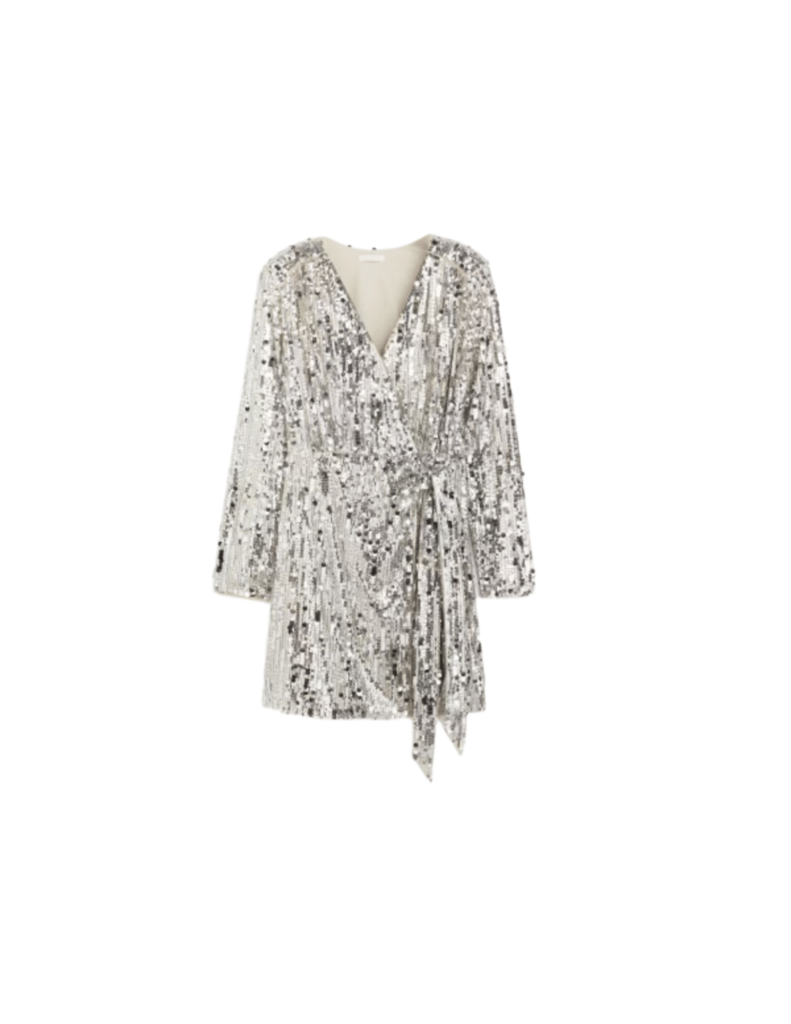
SEQUIN WRAP DRESS
After much contemplation and searching, I’ve found the perfect holiday party dress. This sequin wrap dress is more than just a dress; it’s a confidence booster. – it all adds up to an ensemble that’s bound to make HER feel radiant. This dress is a celebration waiting to happen!

The post Holiday Gift Guide For Her appeared first on .
]]>The post DIY Easy Amber Glass Ornaments: Adding Vintage Charm to Your Holiday Decor appeared first on .
]]>
Amber glass ornaments exude a timeless, vintage charm that’s perfect for elevating your holiday decor. The best part? It’s an easy to make DIY Christmas ornament with a few simple materials and a touch of creativity. In this DIY guide, we’ll show you how to craft your very own amber glass ornaments that will beautifully complement your holiday tree. So, let’s get started!
Click here for a link to the exact materials I used.
Materials You’ll Need:
2. Alcohol ink in the colors Latte, Caramel, and Ginger
3. A blow-dryer
Step 1: Prepare Your Materials
Before you begin, make sure you have all your materials ready. Clear Christmas ornaments provide an excellent canvas for this project, allowing the colors to shine through beautifully. You’ll also need alcohol ink in the warm, inviting shades of Latte, Caramel, and Ginger. And, of course, don’t forget your trusty blow-dryer.
Step 2: Creating a Unique Look



1. Start by removing the cap from the Christmas ornament, exposing the opening.
2. With the ornament opened up, carefully pour your chosen alcohol ink colors inside. The combination of Latte, Caramel, and Ginger will create a mesmerizing amber effect.
3. Now, the magic begins! Hold the ornament and gently swirl it to create your unique pattern with the alcohol ink.
If you want a solid amber color without the swirl pattern, you just need to coat the entire ornament with the alcohol ink evenly and then use the blow dryer.
Step 3: Enhancing Your Creation

To add some distinctive finishing touches:
1. After you’ve achieved the perfect swirling pattern or a solid amber color, it’s time to enhance your ornament’s appearance. Spray paint the cap of the ornament in black for a sophisticated contrast.
2. Once the black paint has dried, reattach the cap to the ornament.
3. Cut a length of velvet ribbon of your choice. Velvet adds a touch of luxury and complements the vintage charm of your ornament.
4. Tie the velvet ribbon in a graceful bow around the top of the ornament. This ribbon not only adds elegance but also makes it easy to hang your creation on the tree.
Step 4: Admire Your Hard Work




After adding the black cap and velvet ribbon, take a step back and admire your creation. These DIY amber glass ornaments will add a touch of sophistication and warmth to your holiday decor. At night, they will cast a warm and inviting glow throughout your home.
In just a few easy steps, you’ve transformed plain clear ornaments into captivating amber gla
ss masterpieces. With the warm, inviting colors, unique patterns, and added embellishments, your handmade ornaments will be a highlight of your holiday decorations. Happy crafting!
The post DIY Easy Amber Glass Ornaments: Adding Vintage Charm to Your Holiday Decor appeared first on .
]]>The post Kitchen Reveal & Budget Breakdown appeared first on .
]]>Hi! So I’m finally here with all the dets, I just couldn’t wait to spill the beans on my kitchen renovation reveal. Trust me, it’s like a culinary paradise you’d find in a magazine, and I’m here to share the hilarious journey with you.

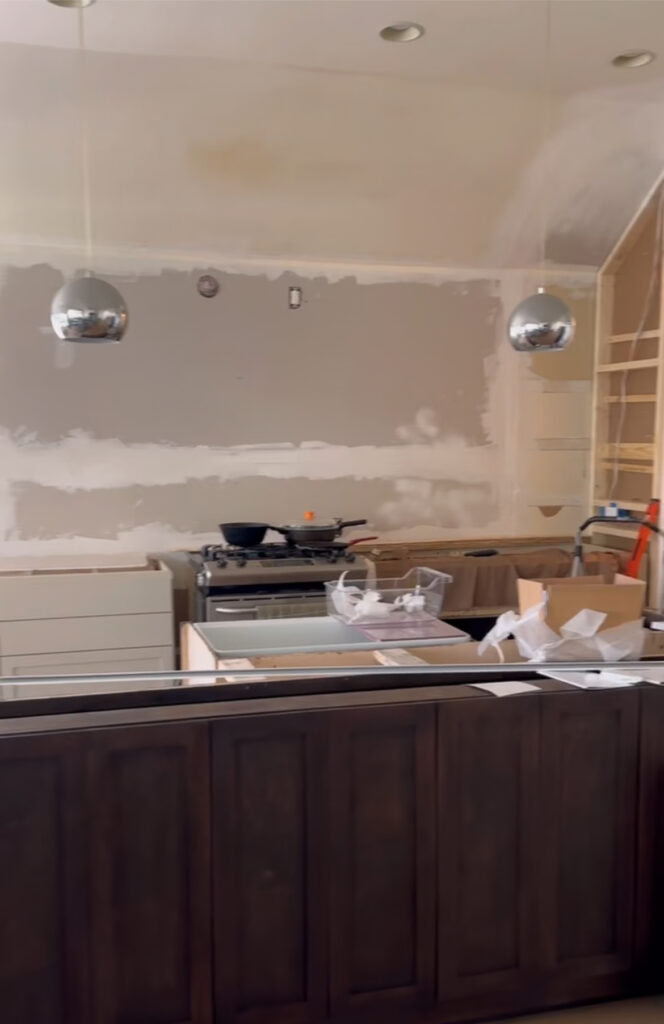
This is one of my biggest projects, and I have to admit, I was nervous. My kitchen was like a time capsule from 2008, and those outdated cabinets were in such bad shape that they looked like they’d seen a century’s worth of wear and tear. Plus, they were all different shades of white, as if they had attended a “Shades of White” party and forgot to coordinate.
But hey, I was determined to turn my kitchen into a space with aesthetics and functionality for my young family. I had grand plans. Picture this: That awkward corner pantry demoed and transformed into a pantry that’s not only functional but also lots of storage, Cabinets with endless shelving space, appliance garages flanking the range, making my countertop look uncluttered. It’s like a cool parking spot for my kitchen appliances, and a cool Fire Clay Sink.
Oh, And the fridge? it’s gone incognito! My fridge is now “panel ready,” which means it’s doing a disappearing act, blending seamlessly into the cabinets.
But wait, there’s more! I decided the coffee nook had to go so I could slide the refrigerator to the right, and That unnecessary opening that connects the kitchen to the dining area Will soon be the future butler’s pantry. I was on a mission to maximize every square inch of space.
And just like that (in Carrie Bradshaw’s voice!) , My kitchen transformation was going to be everything I needed as a Mom, and everything my family needed to handle our everyday lives!

The Pantry Remaster
Our new pantry measures 30×70 inches, with a door opening that’s a generous 38 inches wide. Towering above, the door stands at an impressive 90 inches in height, making for a grand entrance. How could I, go without adding my signiture Indian block print skirt, giving it a touch of personality , while also being functional (hiding any mess).
Now,the heart of our pantry masterpiece was the shelving. Under the skirt, you’ll find a handy shelf, perfect for quick-grab items. But that’s not where the story ends. Above the skirt, we’ve created a shelving system with a total of 6 shelves. Each shelf has a generous 1-foot gap, ensuring ample space for all our pantry essentials. And between these shelves, there’s approximately one foot to 15 inches of space, making organization a breeze.
But that’s not all! In the old pantry, things were a bit awkwardly cornered at an angle, limiting storage space. So, we decided on taking that ceiling off. Now, our pantry reaches for the skies, offering more room up top to store those items not needed for everyday use.
In a nutshell, the Pantry Remaster is a testament to how a dash of creativity and a lot of hard work can turn even the most challenging space into a functional and stylish pantry.
Cabinets
Choosing the right cabinets for my kitchen was a journey in optimizing both functionality and aesthetics. I made a deliberate decision to go with drawers for all the lower cabinets, a choice that has proven its worth in accessibility and organization. The ease of reaching in and finding what I need has made me a firm believer that drawers are the way to go for lower cabinets. But my cabinet selection wasn’t just about practicality; I wanted my kitchen to be a statement piece. To achieve this, I incorporated a Toe kick like detail that transformed the space into more than just a kitchen—it became a piece of fine furniture.
One of the key elements that contributed to both functionality and aesthetics in my kitchen was the countertop appliance garage. By extending it on both sides of the range, from countertop to ceiling, I not only concealed my appliances but also created a visually distinct boundary that made the kitchen appear cozier and more intimate. Customization played a pivotal role in my cabinet design, with angled cabinets adding an elegant height and unique moldings, such as base cap molding, 1×3 round molding, and 1/4 round molding, taking the place of traditional crown molding for a clean and modern look. My choice of a panel-ready fridge was another space-saving move that made the kitchen feel more spacious without sacrificing storage. Its narrower, taller profile was a perfect fit, offering more room between shelves, and it even accommodates tall items with ease. In the end, my cabinet choices, along with a well-thought-out pantry and microwave cabinet, allowed me to maximize storage and elevate the overall design of my kitchen.
Countertops
Selecting the right countertops was a pivotal decision in bringing my kitchen vision to life. For the perimeter cabinets and backsplash, I opted for the timeless look of soapstone countertops. The soapstone is not only beautiful but also practical, especially for someone like me who uses a lot of Turmeric in cooking. Its honed finish has proven to be durable, resisting etching and staining, even from Turmeric.
But it’s the island countertop that truly steals the show. Crafted from marble with an OG edge, it adds a touch of luxury to the kitchen. What makes it even more special is the thoughtful design choice of having one side squared and the other rounded, creating a soft, child-friendly edge and an eye-catching contrast between the white and black. To further emphasize this contrast, the perimeter cabinets have a lovely putty or mushroom color, allowing the island to stand out as the dark walnut-stained maple wood masterpiece it is. These four distinct colors, putty, black soapstone, white marble, and dark stained island, have seamlessly blended together to create a kitchen that’s not just functional but also a work of art in its own right.
The Island
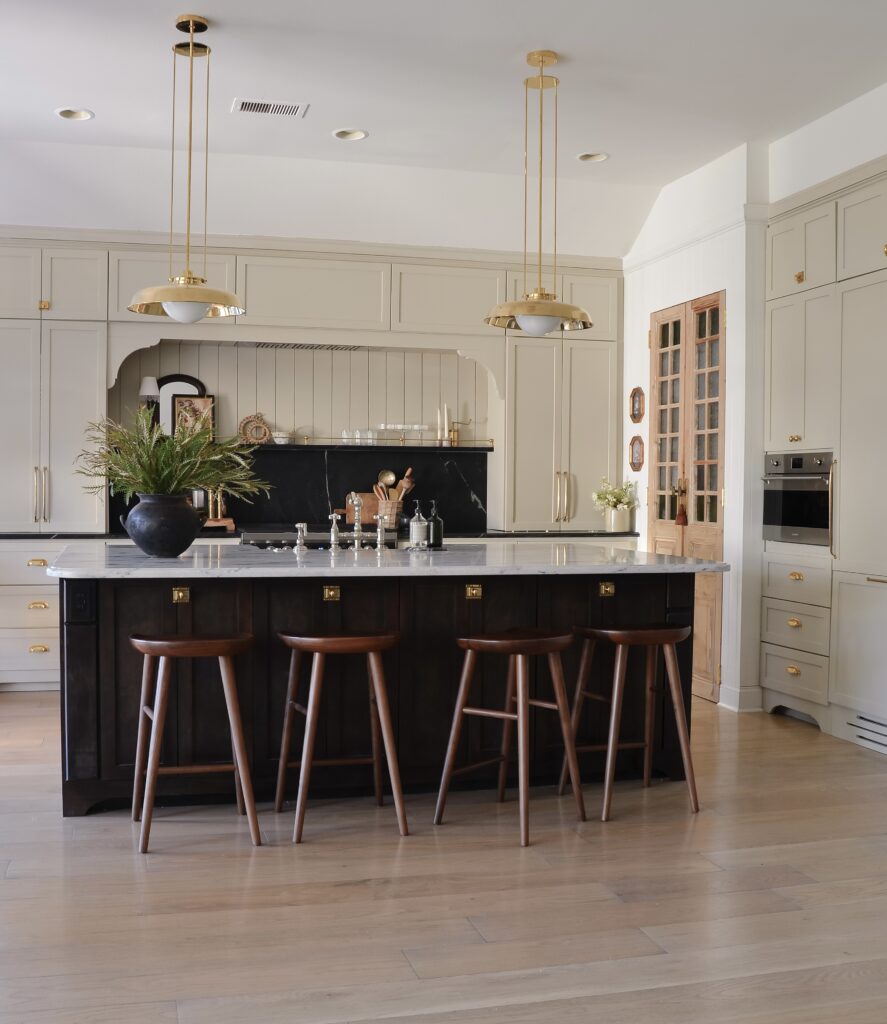

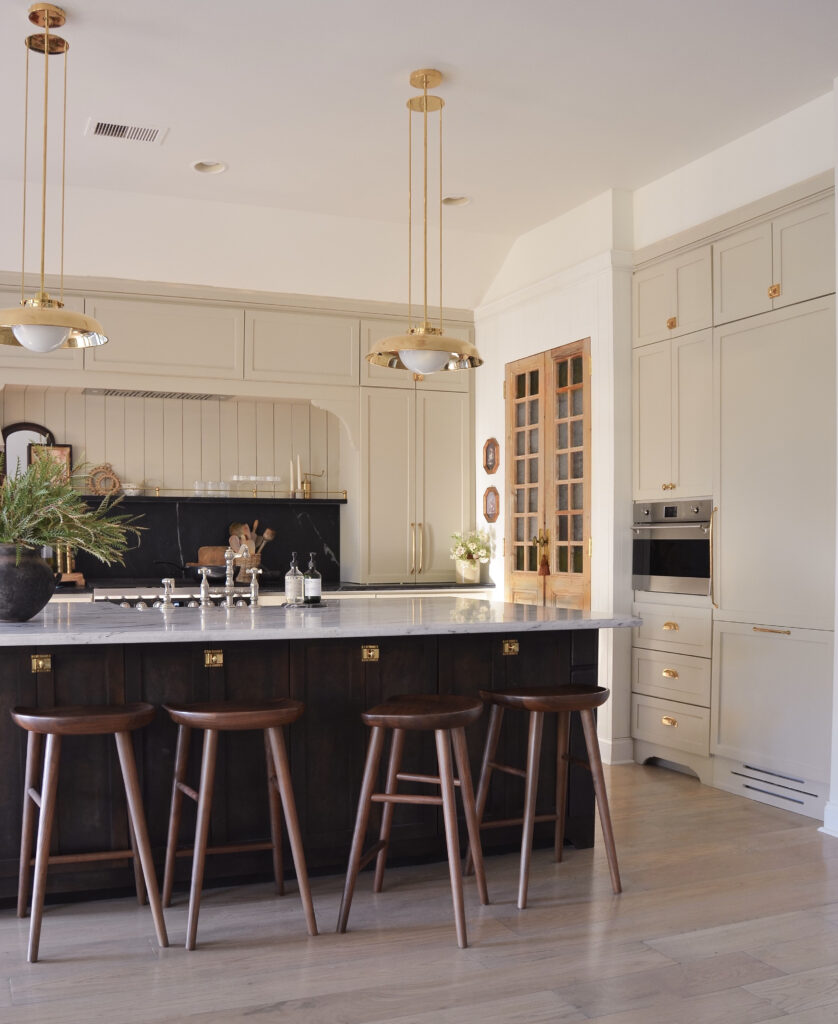
The transformation of my kitchen island has been nothing short of remarkable. From the outset, I adored its size and footprint, but it was plagued with issues that demanded a complete overhaul. Electrical woes, water leaks, and a persistent odor made it clear that the island had to go. This decision marked the turning point of my kitchen renovation journey.
The island’s rebirth involved more than just cosmetic changes. We replaced the entire island, adding new OSB Sub-flooring and addressing the electrical problems once and for all. Strategic placement of electrical outlets became a priority, with one discreetly camouflaged in the front for guests to charge their devices while sitting at the stools, and another on the sink side for convenient appliance use. A small cabinet now houses cutting boards, while a built-in trashcan within the island keeps everything picture perfect, but we didn’t stop there we added and Air Switch garbage disposal: they’re like your kitchen’s secret superhero. Picture a fancy button by your sink – press it, and boom, your food scraps disappear like magic. It’s the superhero costume your kitchen never knew it needed. Capes are out, air switches are in!”
Under the sink, another cabinet keeps dishwasher pods and essentials neatly organized. On the opposite side, where the countertop stools are, three small cabinets offer additional storage, a welcome departure from the previous open and chaotic arrangement. The island, finished in Varathane Dark Walnut with a matte finish, stands as a striking contrast to the Sherwin-Williams Sandbar Satin-finished kitchen cabinets. The island has not only regained its functionality but has become the heart of my kitchen, a testament to the transformative power of a well-planned renovation.
Creating a Seamless Kitchen Hood: A Design Choice Explained
In my quest to design the perfect kitchen, one element that demanded careful consideration was the hood. Many design choices were at my disposal, but I ultimately chose a unique approach for a seamless and sophisticated look.
Opting for a standalone hood would have introduced complexities and angles that clashed with my vision of clean, uninterrupted lines. Moreover, our kitchen’s sloped ceiling at the back would have clashed with a statement hood, making it appear out of place.
To achieve the finished look I sought, I integrated the hood seamlessly into the top cabinets. This clever choice created a straight, uninterrupted visual flow, effectively mimicking the presence of a hood without the need for an extra structure. To enhance this illusion further, I forwent traditional cabinet knobs, instead opting for press-and-open magnetic closures, ensuring a sleek and unbroken surface that gracefully imitated the form of a hood.
To infuse a touch of character into the range area, I strategically placed two decorative corbels on either side. This subtle addition not only served as a focal point but also transformed the range into a stunning centerpiece within our kitchen, seamlessly merging form and function in our remodel.
Appliances And Other Pretty Things
In the heart of my kitchen remodel, the choice of appliances played a pivotal role in shaping the functionality and aesthetics of the space. Generously gifted by Smegg USA, an Italian brand renowned for its exquisite and efficient appliances, these additions truly elevated my kitchen’s appeal. Among the standout pieces, my earlier 13-inch range made way for a stunning 36-inch range, boasting a ton of functions that enhance my cooking experience. This five-burner gas range offers unparalleled efficiency, allowing me to prepare meals with precision and style. The panel-ready fridge, another marvel from Smegg USA, seamlessly integrates into the kitchen, offering both efficiency and elegance. The details on this fridge, as we discussed earlier, are simply remarkable. The microwave, doubling as a speed oven, adds versatility to my kitchen routine. Compact at 24 inches, it fits snugly into its designated cabinet space, replacing a bulkier predecessor while delivering top-notch performance.
While some elements remained unchanged, like the dishwasher, I aspire to upgrade it to a panel-ready model in the future, aligning it with the rest of the kitchen’s sleek aesthetics. Transitioning from appliances to aesthetics, the lighting choices in my kitchen were a source of delight. Although I coveted a vintage brass light from a prestigious French brand, budget constraints led me to discover the Ormond pendants from rejuvenation. These handblown glass fixtures with unlacquered brass accents added a touch of elegance to my space, showcasing a harmonious blend of vintage and modern. In my quest to mix metals and create a balanced contrast, the polished nickel kitchen faucet emerged as a standout feature. Its warm tone beautifully complements the brass accents and marble countertops, and its vintage-inspired design adds a timeless charm to the space. The hardware, all from rejuvenation, was thoughtfully selected, combining various styles like cupboard latches, oval knobs, Macy pulls, and bin pulls. These choices not only reflect my love for unique finishes, but they also prove that hardware is a key element that can elevate any kitchen’s overall appearance. Mixing metals, like the unlacquered brass, brings character and intrigue, and I cherish the patina that has developed on my fridge handle, a testament to the lived-in warmth of my renovated kitchen.
In the end, the appliances and design elements I chose have transformed my kitchen into a space that not only functions flawlessly but also radiates a unique and personal aesthetic that I am proud to call my own.

The Budget Breakdown + Links
The post Kitchen Reveal & Budget Breakdown appeared first on .
]]>The post Renovating our Home Office appeared first on .
]]>Renovating our home office was part of the One Room Challenge that I had participated in the
year 2020 and it was a fun project.
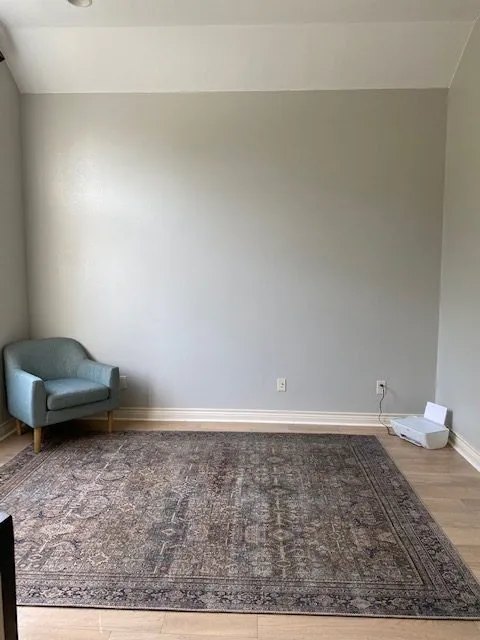
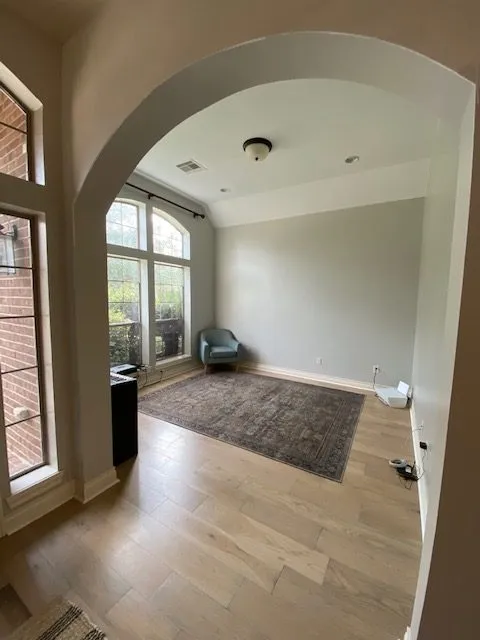
Our home office is right off the entrance and I planned to go for a dark moody room top to
bottom and have some fun in this space. There’s lots of light in this room so I didn’t really mind
the dark color. I got loads of paint swatches from Sherwin Williams to decide on one.
For storage, I definitely wanted to go with the IKEA Ivar cabinets and lots of wall moulding on
one wall and a gallery wall on the other. So, I went for a mixture of traditional, modern and
vintage!
Before you go for IKEA Ivar cabinets, let me tell you that you might face these issues:
- Some cabinets have a gap between the doors and since I am painting it a darker shade so
hopefully won’t look bad. - One of the doors might hit the ground while the other door is fine.

A brief run-down of my home office makeover:
- Built a base with 2x4s
- Installed IKEA Ivar cabinets
- cut and nailed 1-3/8” base cap moulding from @wearewoodgrain in varying sizes
- nailed in 3/4” plywood on top of the IKEA cabinets
- iron on veneer to mask the rough edge of the plywood
- build shelves between cabinets to fill gap
- chunky crown moulding also from woodgrain
- primed and painted with Sherwin Williams Andiron
- decorated with art that I’ve collected over time, meaningful memories for our family and some
heirloom antique pieces!
All the details are saved in “home office highlights”
#wearewoodgrain
Getting to work
I started off by taking off the baseboard. A small tip for you to always score off the caulk with a
painter’s multi tool/utility knife otherwise it will damage your wall.
Then I dry-fitted the 2*4s wood pieces to put the cabinets on top. Before screwing the pieces
together, I marked where the studs are going to come and went ahead screwing it in from font
and back. I also made sure the screws are countersunk, so it sits flush with the wall.
To get rid of the wall texture of our home office, I used hardboard and put wood filler on the
seams. My suggestion would be to always get an angle finder first, measure and then cut the
boards before putting them in, otherwise it might not lie aligned.
Crown molding is hard but if you are planning to do that, and my recommendations are:
- Determine your spring angle first
- Calculate miter and bever angle.
- Get a cheat sheet for how to make your cuts.
Our crown molding is 6 inches wide, I figured out a moulding design and used blue tape to
visualize and a level and marker to pattern out. Then, I cut the pieces for the moulding, every
single wood piece is cut the same way- with 45degree angled on both sides. Next, I secured the
cabinets with screw and had the base boards done. Lots of prep work followed after that like
hammer the nails in that were poking out, put wood filler to fill nail holes and use caulk in the
seams. Once that was done, on top of the cabinets, I used ¾”plywood cut at @loweshomeimprovement
Priming and Painting
Before I started painting our home office, I put primer mainly to seal off the wood filler and for
better adhesion of the paint. My walls are semi-gloss finish, so got the priming done first with a
@homerightps sprayer (Kilz sprayer). I did use a little water to thin itdown; for a 1100 ml
container, I used 100 ml water. Around 10% water should be good.
Now letting you know what I learnt the hard way, so you don’t make the same mistake-
Sanding off an MDF board is not a good idea, as the seams were more obvious on a dark paint. It
became irregular and wasn’t looking good at all. I put aqua coat which also did not help, and I
actually ended up putting a moulding to cover the seams.
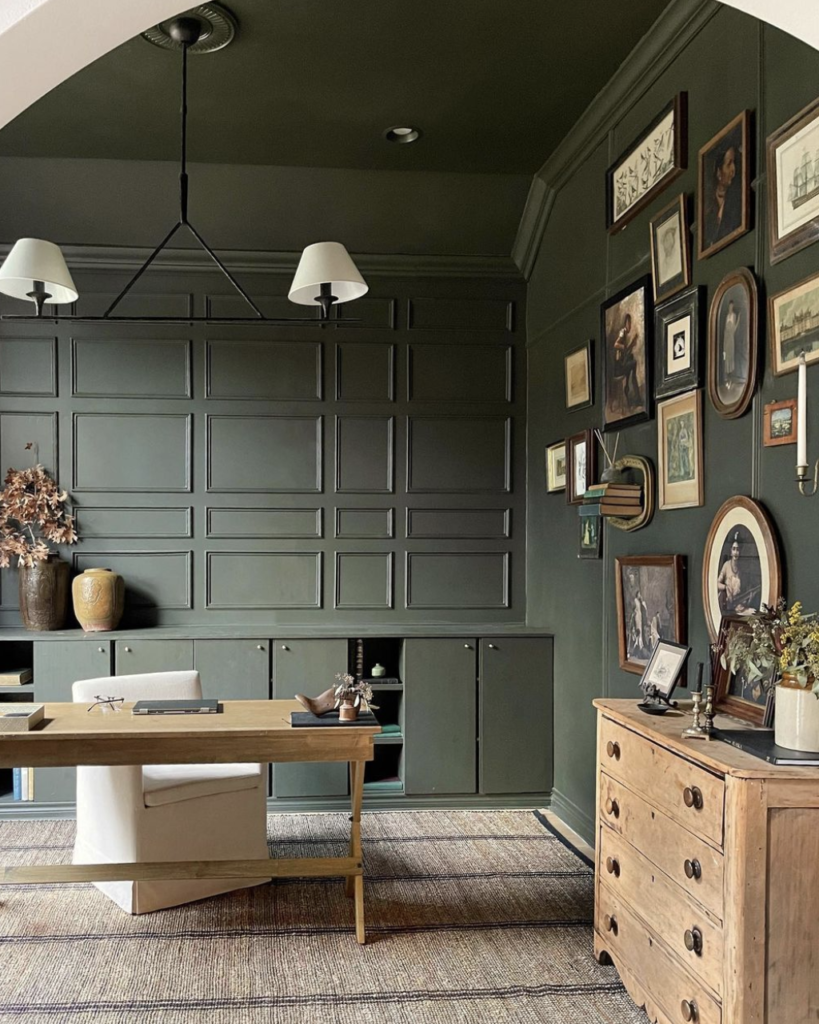
Once all the hard work was done, I used an emerald line from Sherwin Williams, I used the color
as recommended and here’s how my home office looks finally.
The post Renovating our Home Office appeared first on .
]]>The post IKEA Rast Hack appeared first on .
]]>
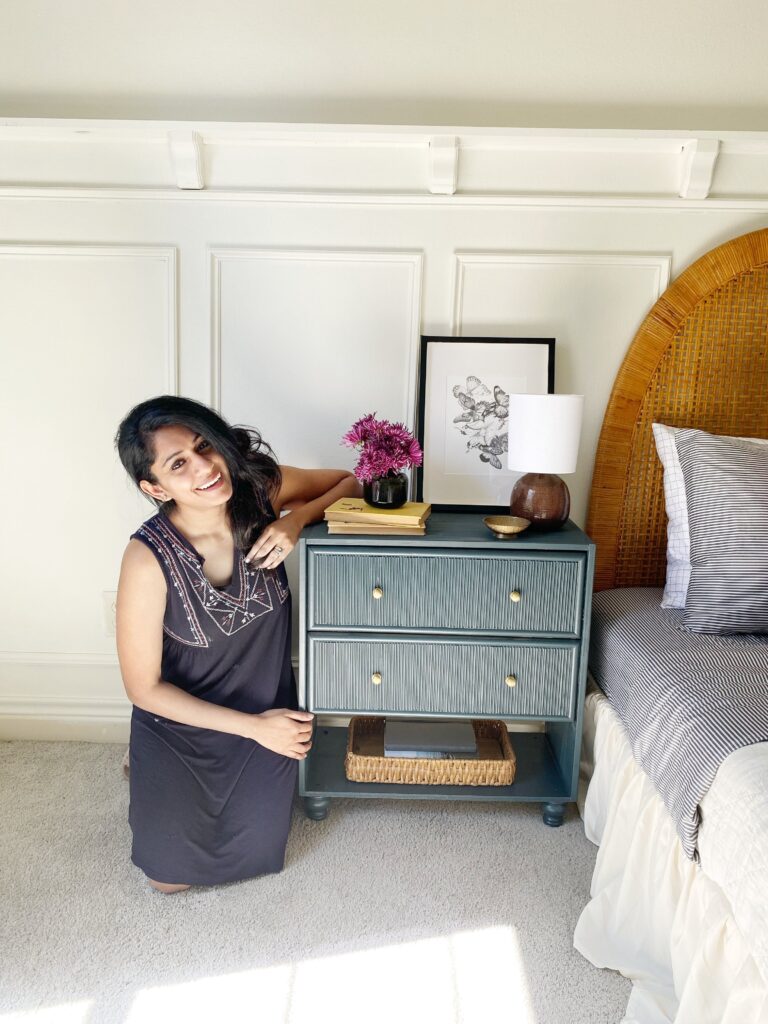
Planning:
Before I started my project, I wanted to plan what I wanted my final project to look like:
- Keep only two drawers
- Add brass pulls/knobs
- Add reeded details to the drawer front
- cut toe kick and add legs
- Paint
Cutting and assembling:
I assembled the drawer based on the IKEA Rast manual then cut a ½ inch plywood – one to attach to the top and one to the bottom. I attached the bottom piece to the dresser with pocket holes; in this case pocket holes are not necessary, you can also screw it in directly from the side.
Then framed it out with dowel pieces to give it a border. I decided to have a reeded texture, so got some reeded trims from Wear a Wood grain. Before cutting the reeded trims, make sure to measure the distance between the top and bottom dowel pieces. For a cleaner finish, I taped a few pieces together and use a painter’s tape for cutting down the reeded trim as needed. I got my reeded trims from We are woodgrain but they are also available in Home Depot.
Once, I had the pieces cut in proper lengths, I glued them to the drawer front one by one. The pieces fit perfectly but there were gaps between the trims, so I caulked them with glue.
Finally, I attached the legs by screwing them in from down and used a drill bit to countersink it, so screw won’t be seen.
I got the knobs of the drawer from amazon.
Painting:
For the paint, I used Mount Etna by Sherwin-Williams with a roller and used paint brush to paint in the drawer fronts.
And done!
Tips:
Some tips for this IKEA Rast hack:
- I get asked a lot; why caulk and not wood-filler? Because, wood filler would be harder to clean up and I would’ve had to sand these grooves, wood would have lost its shape. So caulk worked better for me.
- Always check the board length before doing a pocket hole – mine was a little long and I made a mistake by not checking it before doing the pocket hole and ended up doing another round of pocket holes.
- I used a kreg-jig for pocket holes but you can also screw it directly from the side and counter sink it. I have a small video about how to use a kreg-jig, in case you want to check it out.
The post IKEA Rast Hack appeared first on .
]]>The post How to fix floating shelves from sloping down appeared first on .
]]>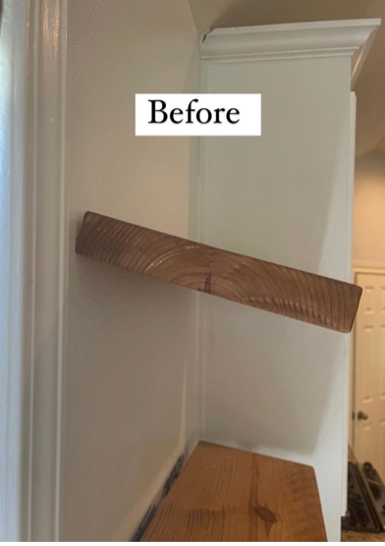

Step 1: Taking off the anchors from the drywall
Tips to cause limited damage to the drywall:
– first, take a bigger size screw
– drive it in a little
– wiggle out the anchor
Step 2: Fitting back the floating shelf brackets
Drill the wall with a half inch bit and put the toggle anchor in and break off the extra bit. The toggle that worked best for me is the one I got from Home Depot (Linked here). When you have a good anchor for your screw, put the brackets in and then repeat the steps for the rest. Link to my floating shelf brackets here.
Step 3: Getting the board ready for the shelf
After cutting the 2X8 inch board, I recommend using a drill guide otherwise the hole will be sloped. Always put a tape on the drill to know when to stop drilling. Now, before you buy a drill guide, make sure the drill bit fits the slot. It was frustrating for me in the beginning as the half-inch drill that I bought didn’t fit in the half-inch slot. I ended up drilling with the small drill bit, taking the drill guide off, and then used the half-inch drill bit.
I used 220-grit sandpaper to sand off the board followed by a wood conditioner. A 220 – 320 grit sandpaper is recommended to get a smooth and even finish. The stain that I went with is Minmax Polyshade in American Chestnut. You can go for an extra coat to have a darker shade as I did.
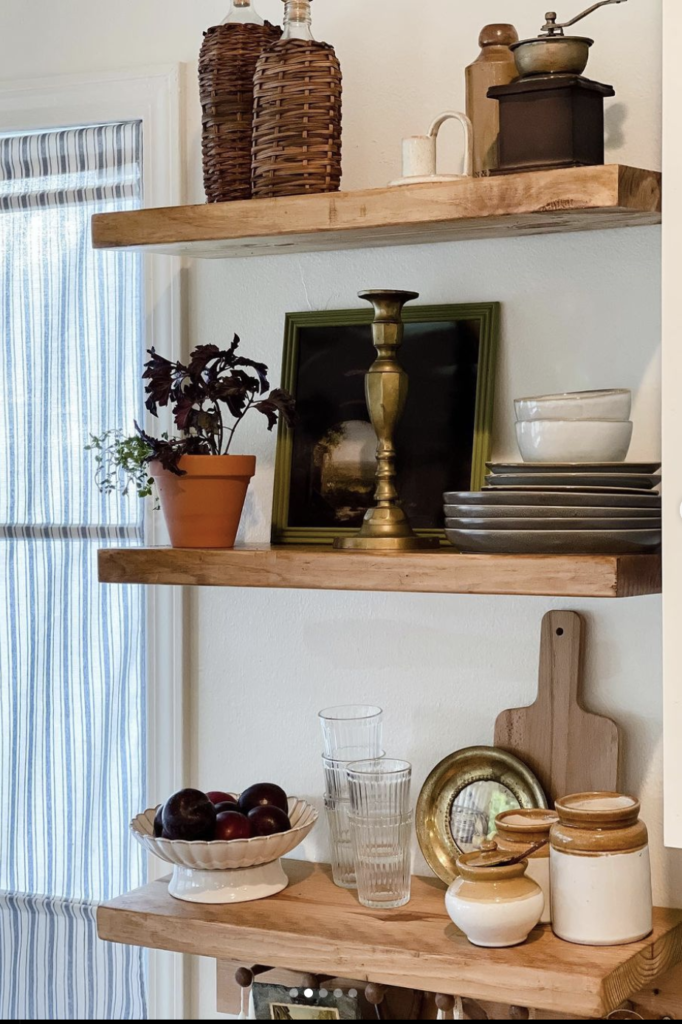
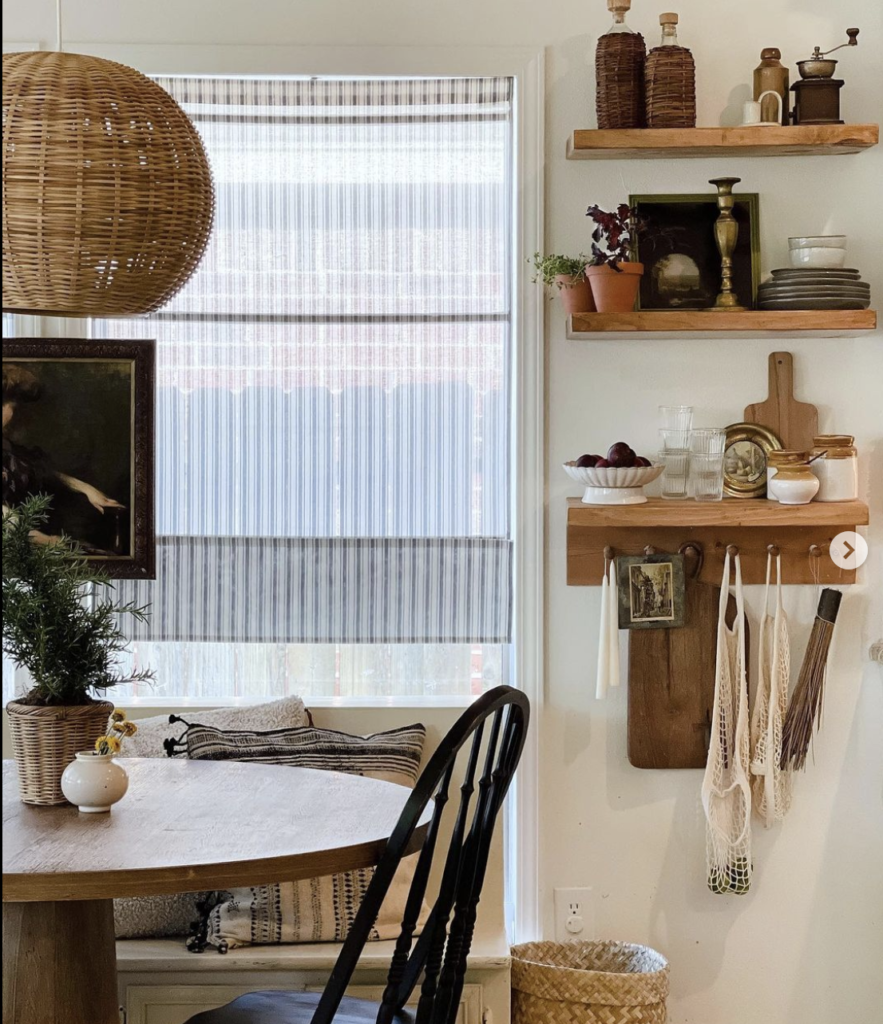
My DIY floating shelves were finally done and this time, it looked perfect!
Please check my Floating shelves story highlight for a video tutorial.
The post How to fix floating shelves from sloping down appeared first on .
]]>The post Dining Room Makeover with The Home Depot appeared first on .
]]>I helped my friends with refreshing their dining space. They moved halfway across the world to live in Houston! They were living in an apartment in Singapore and brought all the furniture with them, but in a Texas home, everything feels smaller. I wanted to help them with their space since moving in itself is overwhelming!
Dining Room makeover- The Before
Here are a few photos of the space before – it’s a well-lit beautiful space that just needed a refresh.
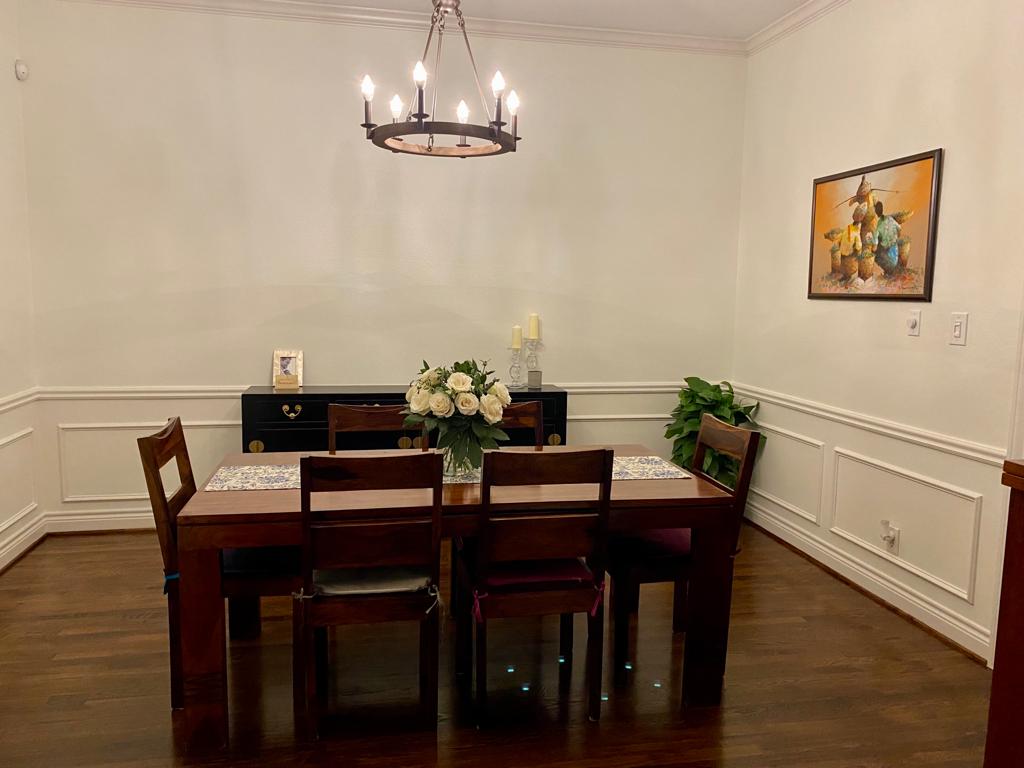

Dining Room Makeover- What I like about this space:
●The wainscoting
●White walls
●Beautiful black sideboard they got from Singapore!
What I planned to change:
●The dining table – the current dining table is small for this space, and they want to be able to host more people here. We got an extendable table just to keep it flexible.
●Pendant light – Again, the current light is small for this space. I wanted a more linear light that’s proportionate for the new table. It also needs to make a statement since this is the first room you see when you walk in!
●Chairs- since this is a room and not a big open space, I wanted shorter profile chairs, as that would make the space feel more open as opposed to 8 tall chairs.
●Add a mirror/art to anchor the black sideboard.
●Address the side wall and change the current art to something that will fill up the space but not look too crowded. Also, I’ll add a tall faux tree to balance the space.
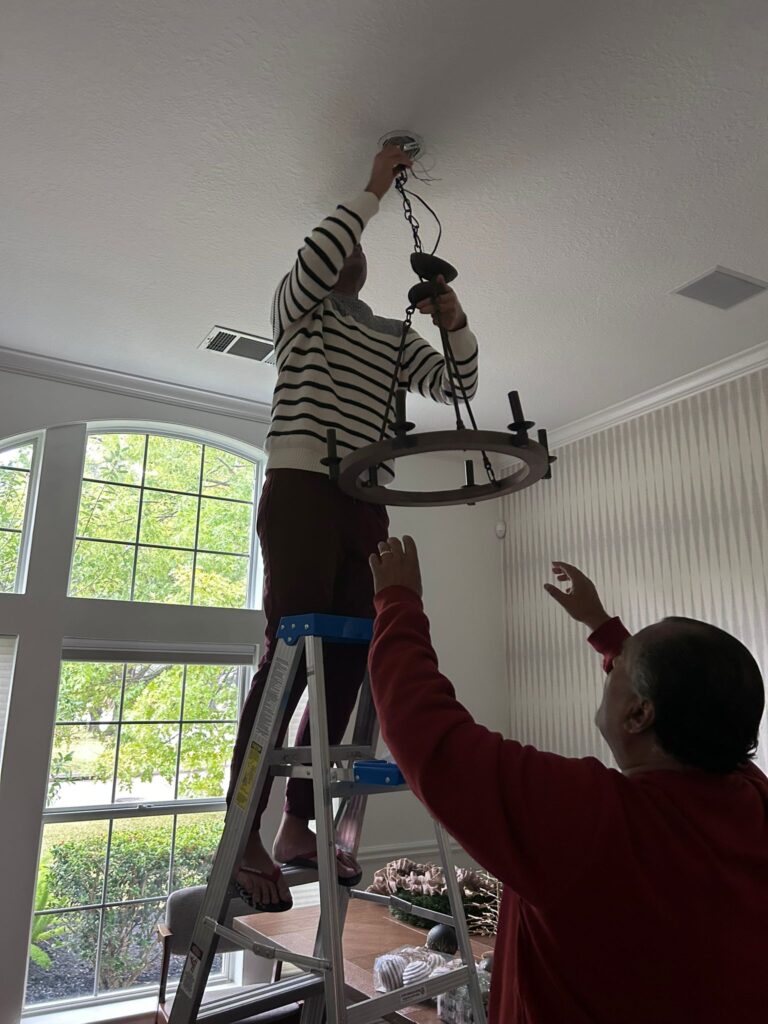
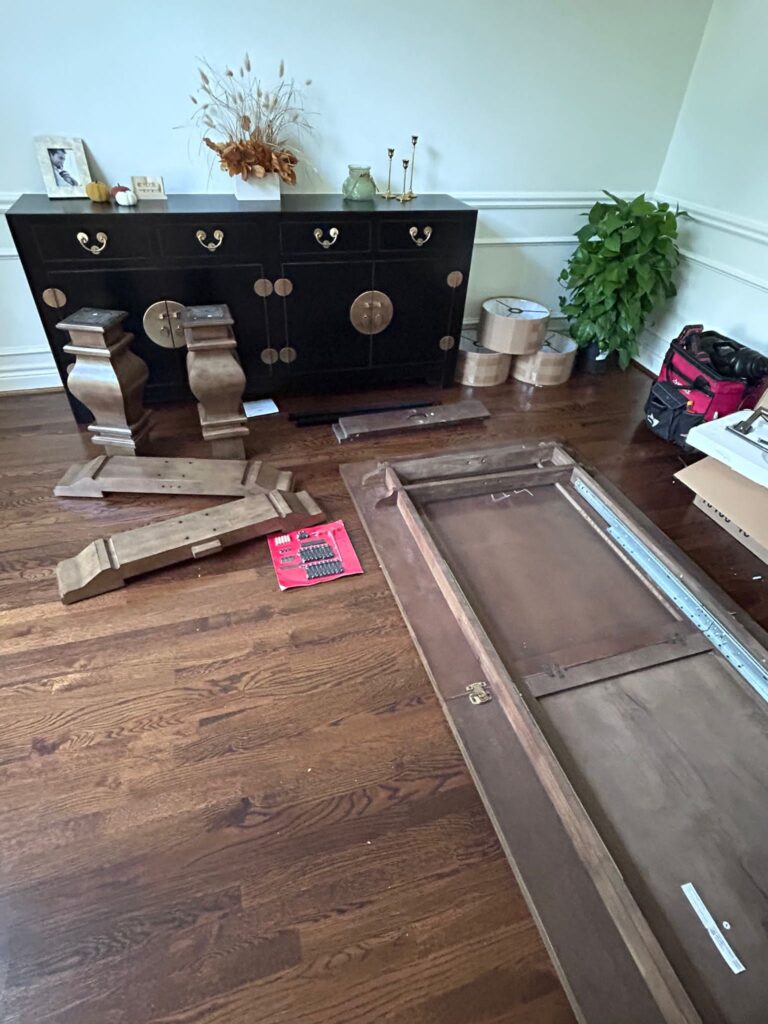
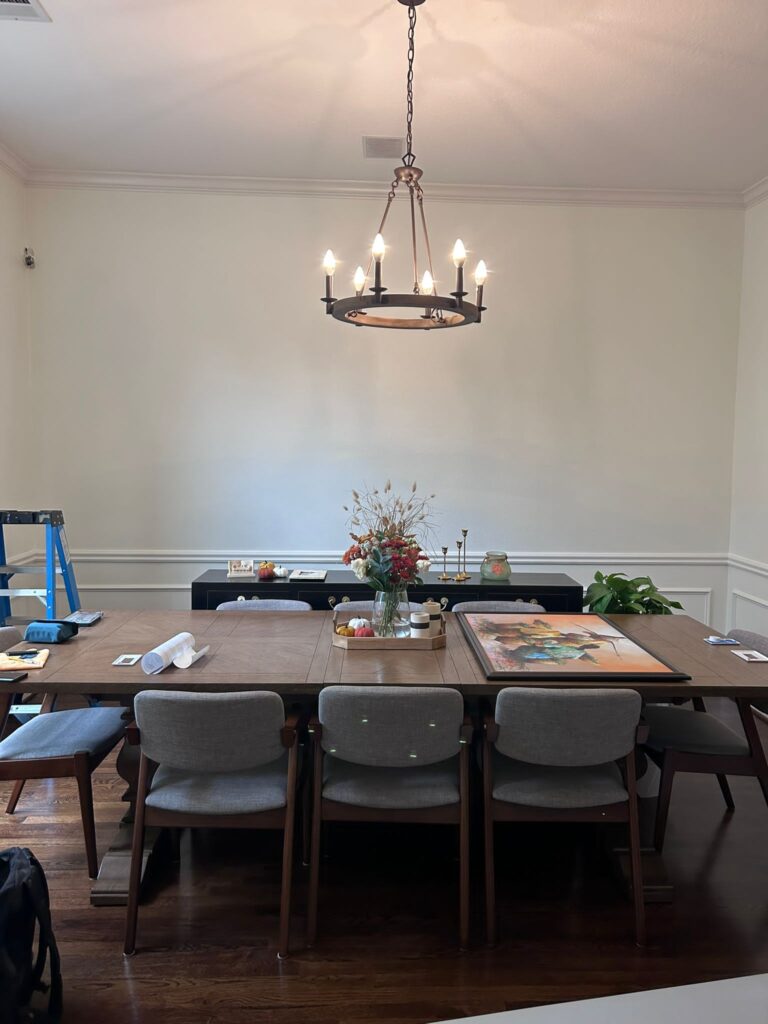
My friends were skeptical of wallpaper but decided to try it. (Spoiler alert – they love it!) I usually prefer the whole room wrapped in wallpaper, but love the alternative of just having an accent wall. It gives the room some pattern and interest without it being overwhelming, and I’m really happy with how this turned out!
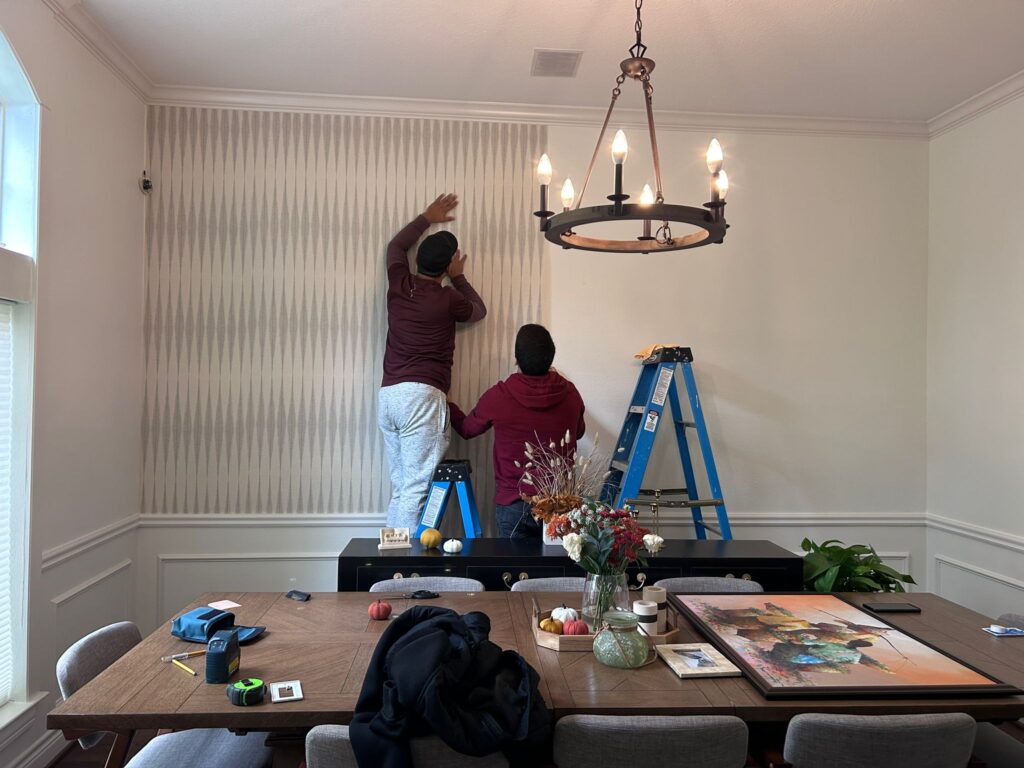
Here is what the space looks like now-
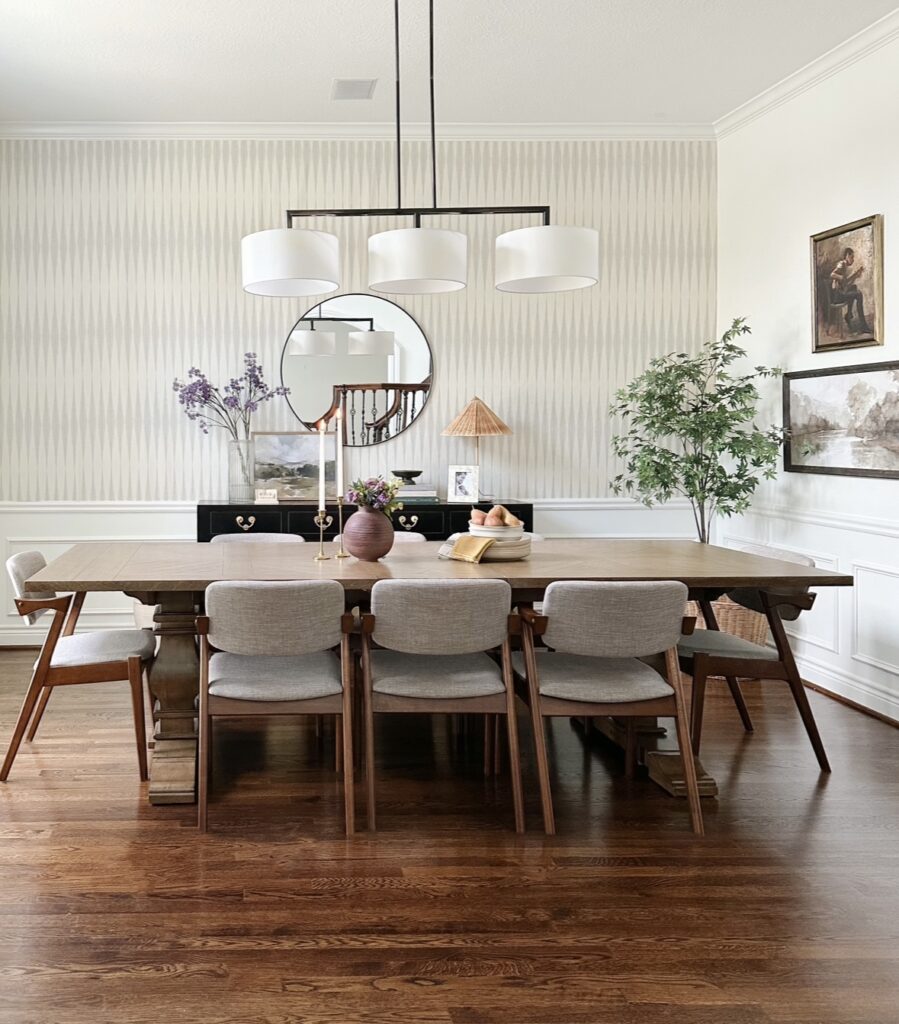
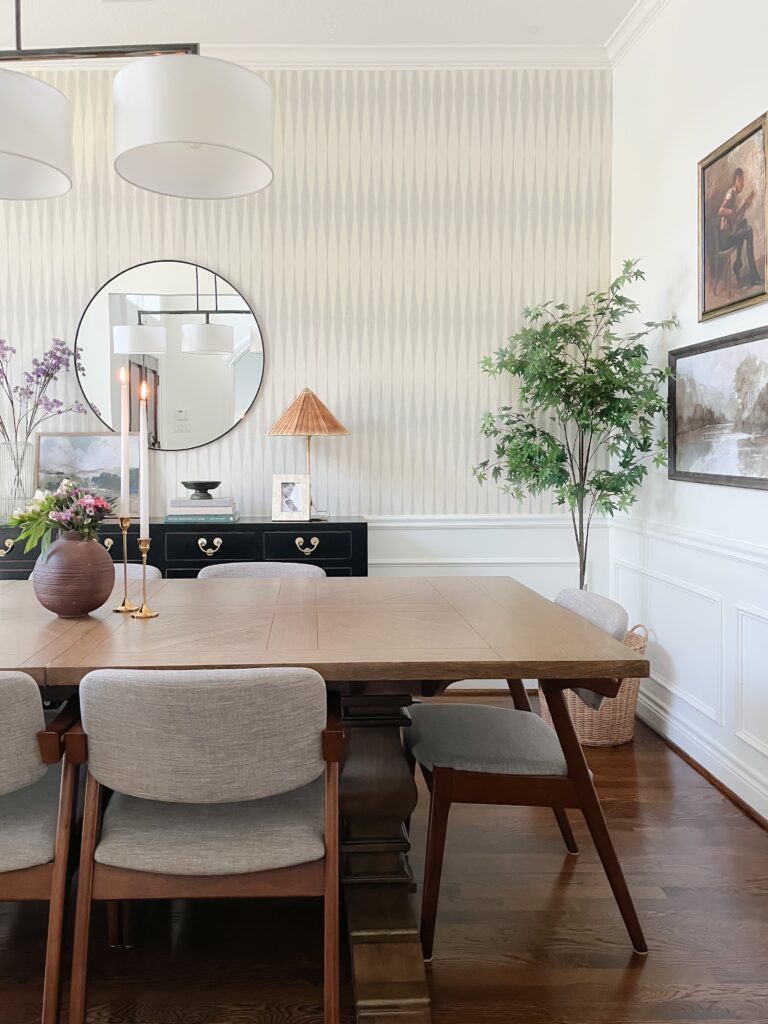
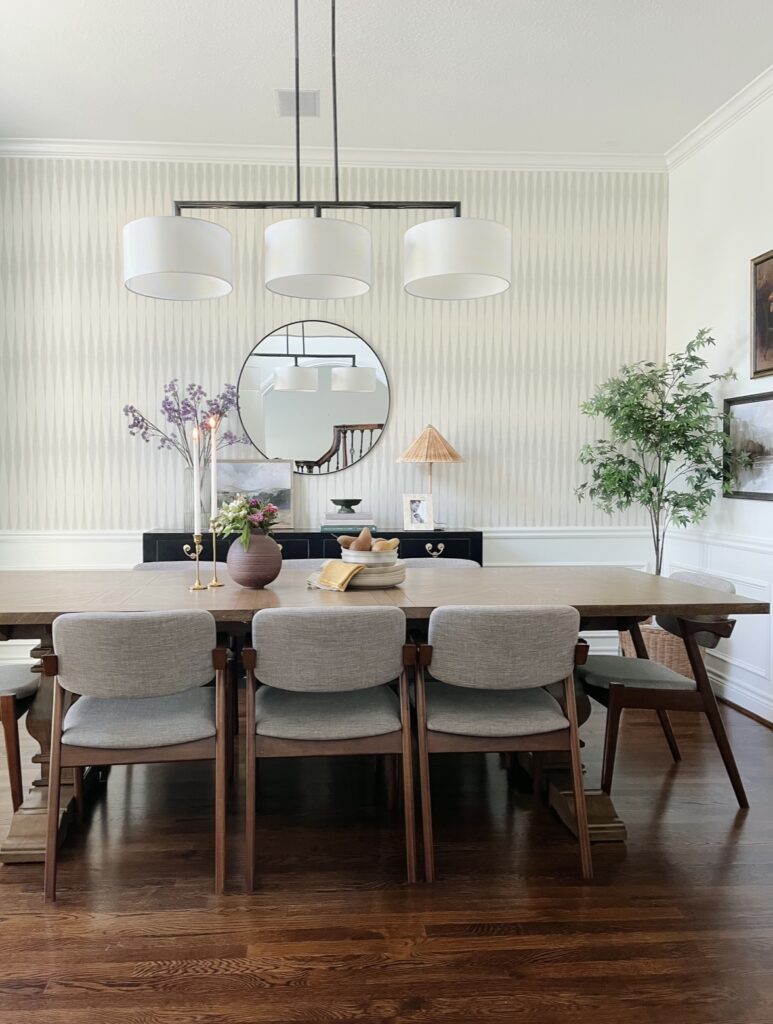
I hope you found this helpful if you are making over your own dining space. I’m so glad I could help my friends with this space with products from homedepot.com/decor. They are so happy with how it turned out and that’s the best part for me! Let me know what you think! XO
Home Decorators Collection
Extra Large Round Black Classic Accent Mirror (35 in. Diameter) https://homedepot.sjv.io/c/2050362/1471884/
Home Decorators Collection
Eldridge – Trestle Dining Table with Self Storing Extension in Haze
https://homedepot.sjv.io/c/2050362/1471885/8154
Baxton Studio
Elegant Gray Fabric Upholstered Dining Chairs (Set of 2)https://homedepot.sjv.io/c/2050362/1471886/8154
Livex Lighting
Meridian 3 Light Black Chrome Linear Chandelier (English Bronze is the color I used) https://homedepot.sjv.io/c/2050362/1471888/8154
Home Decorators Collection
Round Woven Seagrass Storage Baskets (Set of 3) https://homedepot.sjv.io/c/2050362/1471889/8154
Ellen 88 in. L Rectangle Antique Natural Oak Wood Dining Table (Seats 8) http://homedepot.sjv.io/i/2050362/1609448/8154
The post Dining Room Makeover with The Home Depot appeared first on .
]]>The post Bedroom makeover with Furniture & Decor from Home Depot appeared first on .
]]>It will be fun to take you along how I designed a blank canvas to a cozy guest bedroom! Would you believe everything in the room is from Home Depot (except for the art and some small thrifted pieces)? I was honestly surprised to find such a good mix of pieces. You know I’m not a fan of matchy furniture, so I’m loving how this turned out!
Picture Before:

Picture After:

Home depot is a place I check for deals on high end looking pieces for a great price.
You’d not guess the price of this stunning bed frame. And it looks even better in
person!
Use contrasts to make a room look more lively
When putting together a room, my number one tip to making it look high-end is to mix
and match pieces and not get a “matching set” – matching bed, nightstands, dresser etc.
It makes a room look dated and not very interesting!
What I’ve done here is, using pieces that compliment rather than match! For eg: Your
instinct would be to get a dark dresser that matches the nightstand, but the light dresser
really elevates the space and brings in an interesting design element. I especially love
the ring pulls on the dresser – details matter!

When styling a dresser –
Incorporate pieces of varying heights play with scale like large
lamp, vase, layer art of different heights. Use books to layer and add height to smaller
pieces of decor.

Get creative and mix patterns
Mixing patterns is another way to make a space look elevated. I used quite a few
geometric patterns – plaid (accent chair), gingham(curtain), stripe (bedsheets),
diamond(rug) and mixed in a floral quilt to break up all the lines!
A tried-and-true formula to design a room – try to incorporate geometric pattern,
floral/organic patterns and pops of solid colors.
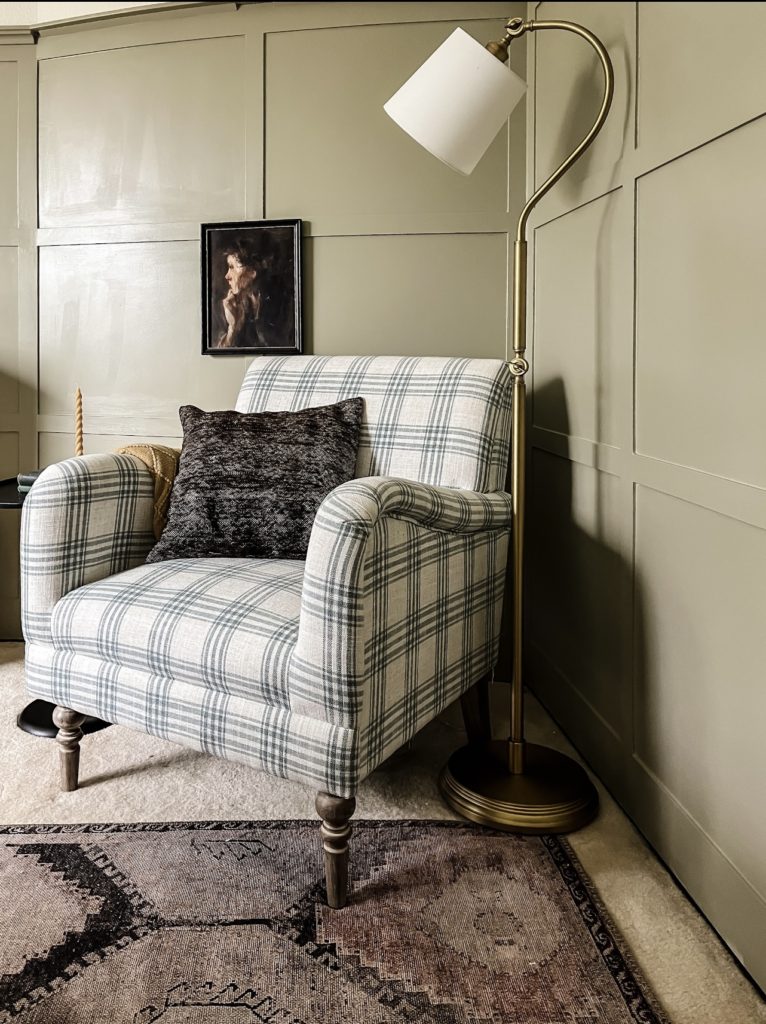
Add a cozy spot
A chair in a corner makes for a cozy spot to read. Make it a nice “moment” by adding a
floor lamp, a small pedestal table and some art.
I hope these tips are helpful when you design your bedroom!
Products Used:
Antique White Ceramic Contemporary Table Lamp with Shade
Navy/White Swirl Glass Table Lamp with White Shade (Set of 2)
Brushed Brass Arc Floor Lamp
Antique Bronze Queen Poster Bed
Graphite/Blush 8 ft. 6 in. x 11 ft. 6 in. Traditional 100% Polyester Pile Area Rug
Blue Upholstered Accent Amchair with Plaid Pattern
Arch Black Wall Mirror
Round Dark Bronze Metal Accent Table
Nature Wall Art Print
Petite Floral Handcrafted Multi Full/Queen Cotton Quilt
Stripe Navy Cotton Percale Queen Duvet Cover
Stripe Navy 200-Thread Count Cotton Percale Standard Sham
Grantley Ivory 6-Drawer Dresser
Buffalo Check Rod Pocket Room Darkening Curtain
The post Bedroom makeover with Furniture & Decor from Home Depot appeared first on .
]]>